General School Settings
Last updated: Apr 10, 2025
Manage Settings
The "Manage Settings" area provides centralized control over crucial operational configurations for your Oraion school portal. This includes how unique identifiers (Admission Numbers, Employee IDs) are generated, default academic behaviors, payment rules, and controls for online admissions (if applicable to your plan). Accessing and configuring these settings early ensures consistency across the system.
Overview
- Purpose: To customize school-wide operational parameters beyond basic profile information.
- Key Areas: Divided into tabs for Admission Number Settings, Employee ID Settings, Academic Settings, Payment Settings, and Admission Status (visible based on subscription plan/features).
- Importance: Setting ID formats before adding students/staff is highly recommended. Academic and Payment settings define default system behaviors. The Admission Status tab controls your online application process.
Accessing General School Settings
- Log in to your Oraion portal as an administrator.
- Click the dropdown arrow next to your School Name in the top-left of the sidebar.
- Select "Settings" from the menu.
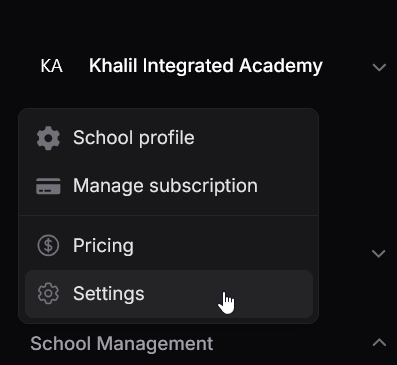
Access General School Settings via the School Name dropdown menu.
Navigating the Settings Interface
The "Manage Settings" page uses tabs to organize different configuration areas. Click on a tab (e.g., "Admission Number Settings", "Employee ID Settings") to view and modify its specific options. Remember to click the dedicated "Save..." button at the bottom of each tab after making changes to apply them.

A. Admission Number Settings Tab
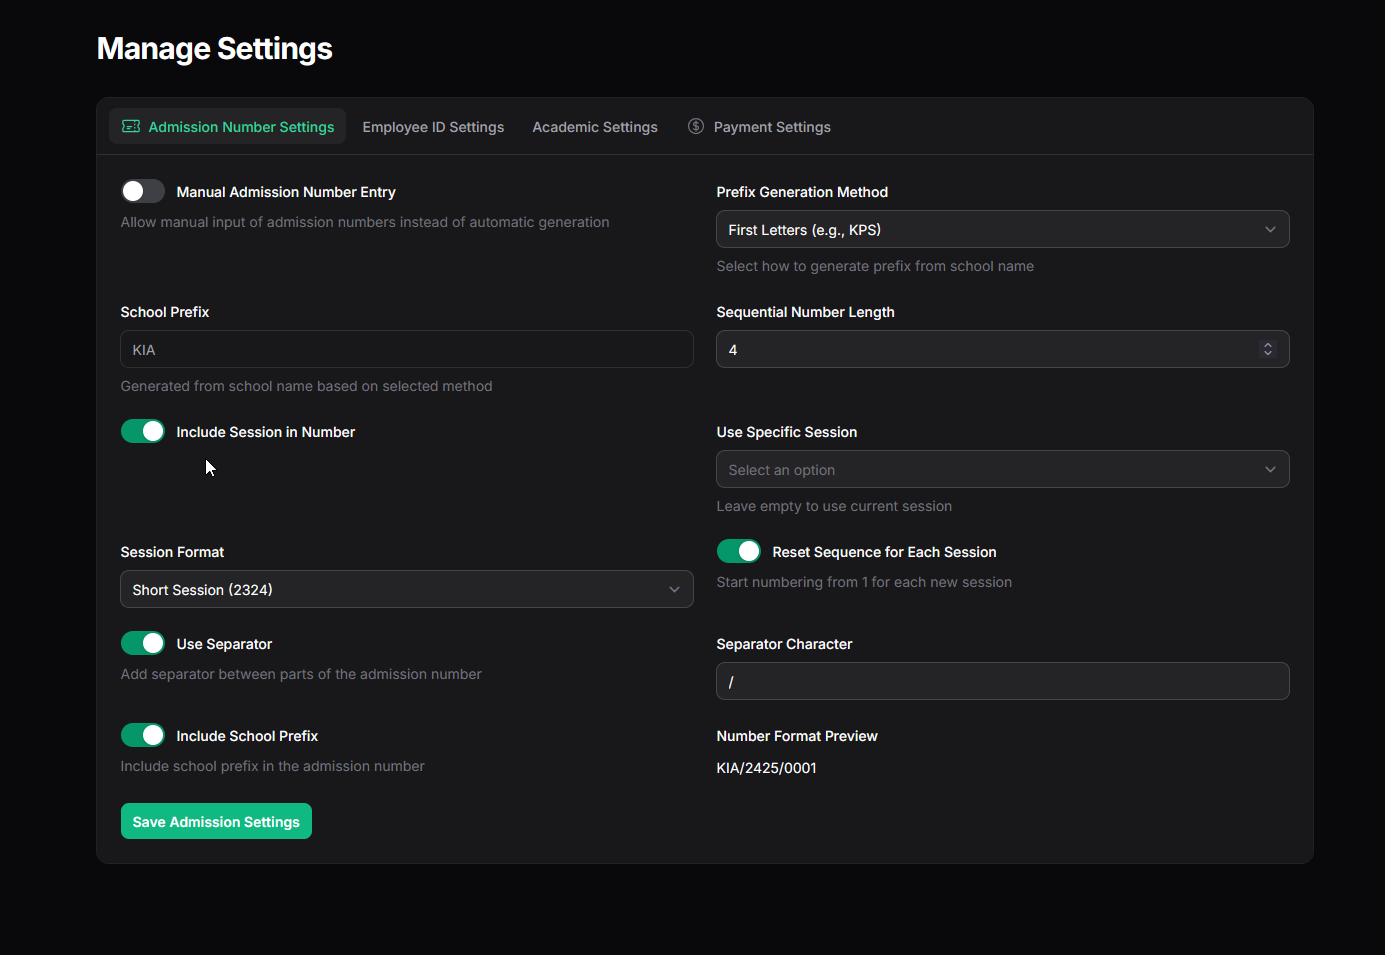
Controls how unique Admission Numbers are generated or entered for students.
- Manual Admission Number Entry: Toggle ON to allow administrators to type admission numbers manually during the admission process, overriding automatic generation. Toggle OFF (default) to use the automatic generation rules defined below.
- Prefix Generation Method: (Visible if Include School Prefix is ON) Select how the prefix is derived from the school name:
- First Letters: Uses the first letter of each word (e.g., Khalil Integrated Academy -> KIA).
- Consonants: Uses the first few consonants (e.g., Khalil Integrated Academy -> KHL).
- School Prefix: (Read-only) Displays the prefix generated based on the method selected above (e.g., KIA).
- Sequential Number Length: Enter the desired number of digits for the sequential part (e.g., 4 results in 0001, 0002...). The default is 4.
- Include Session in Number: Toggle ON (default) to include the academic session/year in the generated number.
- Use Specific Session: (Visible if Include Session is ON) Select a specific past or future session to use in all newly generated numbers. Leave empty (default) to use the currently active academic session.
- Session Format: (Visible if Include Session is ON) Choose how the session/year appears:
- Short Session (2324): Two digits for start year + two digits for end year.
- Short Year (23): Last two digits of the start year.
- Full Year (2023): Full four digits of the start year.
- Full Session (2023/2024): Full start and end years with separator.
- Reset Sequence for Each Session: Toggle ON (default) to restart the sequential number from 1 (or the defined start number) at the beginning of each new academic session. Toggle OFF to have the sequence continue indefinitely across sessions. Recommended ON.
- Use Separator: Toggle ON (default) to add a separator character between the parts (Prefix, Session, Number).
- Separator Character: (Visible if Use Separator is ON) Enter the character to use (e.g., /, -). Default is /.
- Include School Prefix: Toggle ON (default) to include the generated School Prefix at the beginning of the admission number.
- Number Format Preview: Shows an example of the admission number based on the current settings (e.g., KIA/2425/0001).
- Save Admission Settings: Click this button to save changes made only on this tab.
B. Employee ID Settings Tab
Controls how unique IDs are generated for staff members.
- School Name Format: Select how the prefix is derived from the school name (Consonants or First Letters).
- Default Prefix: (Read-only) Displays the prefix generated based on the School Name Format selected (e.g., KHL or KIA). Can also be manually set if needed (though linked to format). The system default is 'EMP'.
- Year Format: (Visible if Include Year is ON) Choose how the year appears (Short Year (23) or Full Year (2023)).
- Start Year: (Optional) Select a specific year to use in the ID format instead of the current year. Leave empty to use the current year.
- Sequential Number Length: Enter the number of digits for the sequential part (e.g., 3 results in 001, 002...). Default is 3.
- Include Prefix: Toggle ON (default) to include the generated School Prefix (or Default Prefix).
- Include Year: Toggle ON (default) to include the year in the ID.
- Use Separator: Toggle ON (default) to add a separator between parts.
- Separator Character: (Visible if Use Separator is ON) Enter the character (e.g., /, -). Default is /.
- Format Preview: Shows an example Employee ID based on current settings (e.g., KHL/25/001).
- Save Employee Settings: Click this button to save changes made only on this tab.
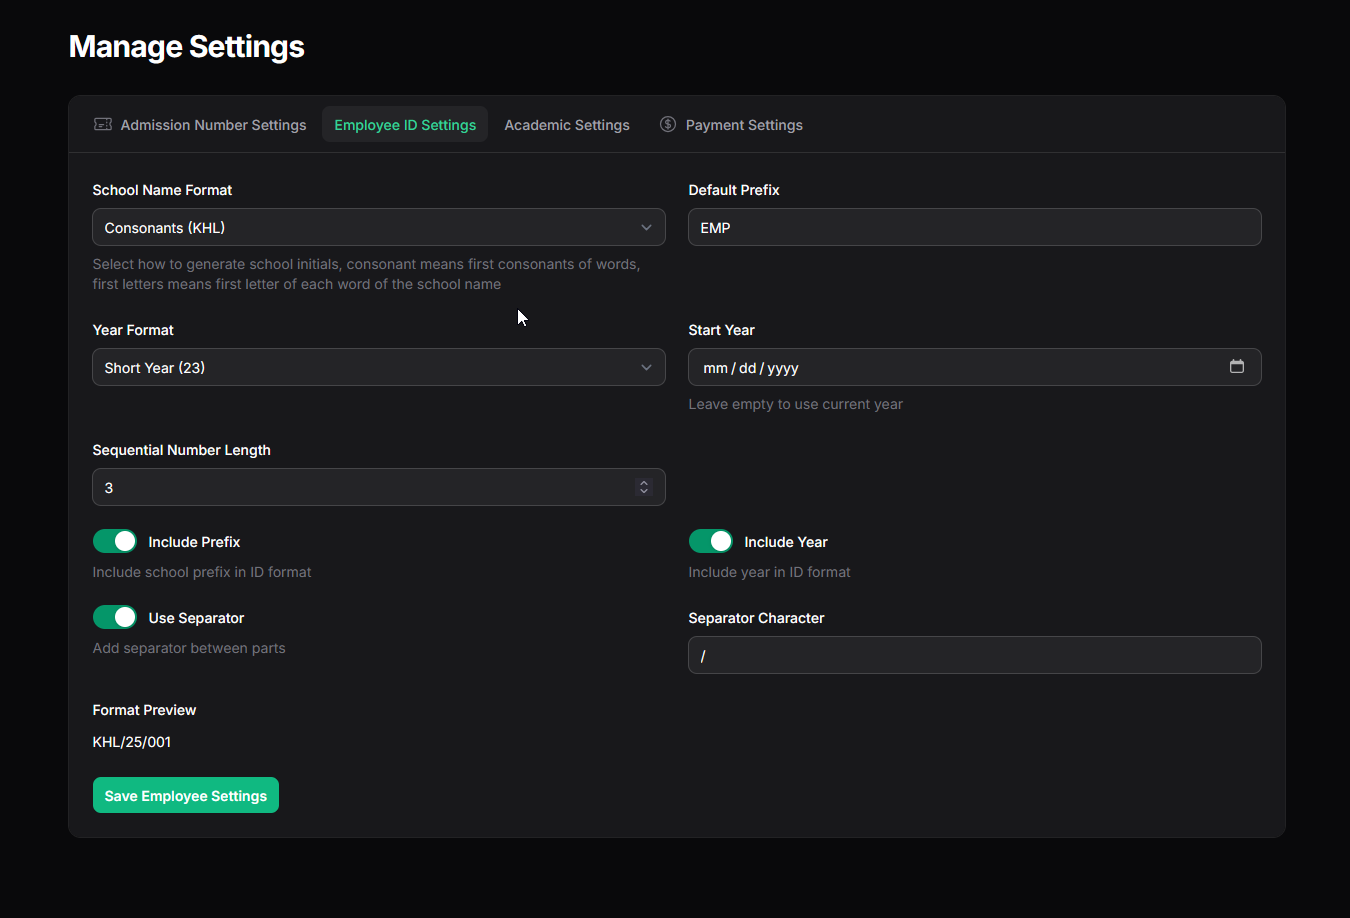
Configure how Staff/Employee IDs are generated.
C. Academic Settings Tab
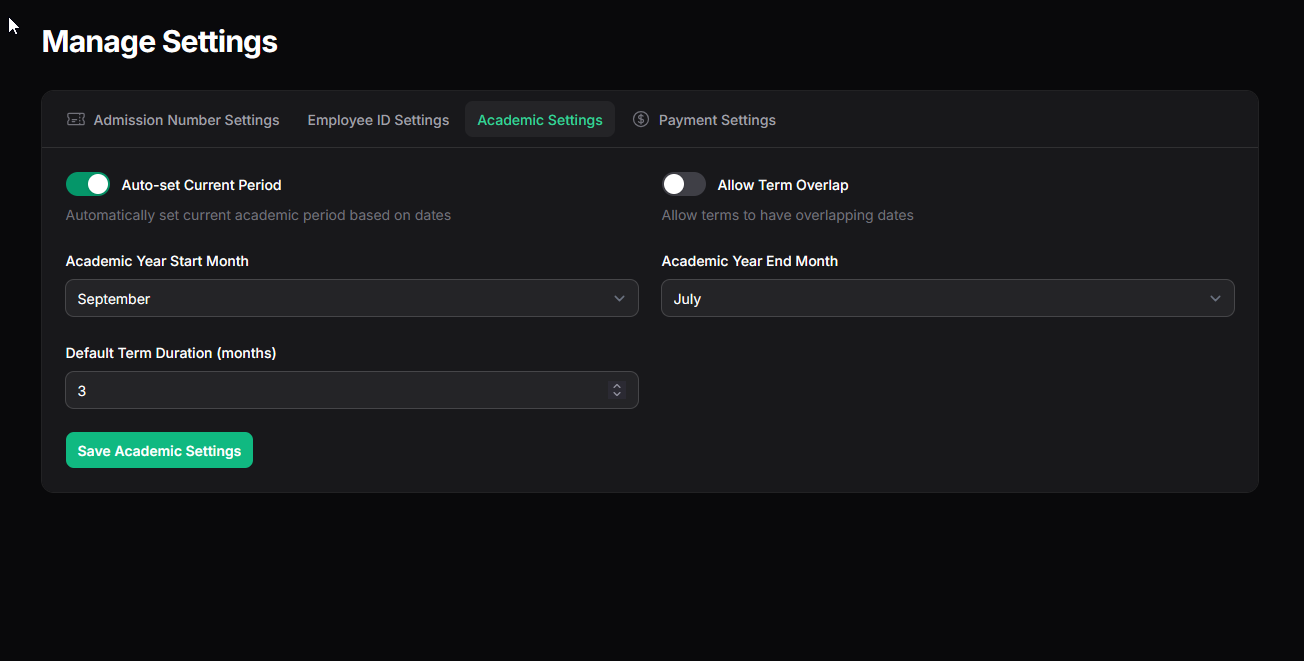
Controls high-level academic year and term behaviors.
- Auto-set Current Period: Toggle ON (default) to allow Oraion to automatically update the "Current" Academic Session and Term daily based on their start/end dates. Toggle OFF for manual control (not recommended for normal operation).
- Allow Term Overlap: Toggle OFF (default). Enabling this allows the date ranges of different terms within the same session to overlap, which is generally not standard practice.
- Academic Year Start Month: Select the month your school's academic year typically begins (e.g., September). Default is September.
- Academic Year End Month: Select the month your academic year typically ends (e.g., July). Default is July.
- Default Term Duration (months): Enter the typical length of a term in months (e.g., 3). Used for estimations or default date calculations.
- Save Academic Settings: Click this button to save changes made only on this tab.
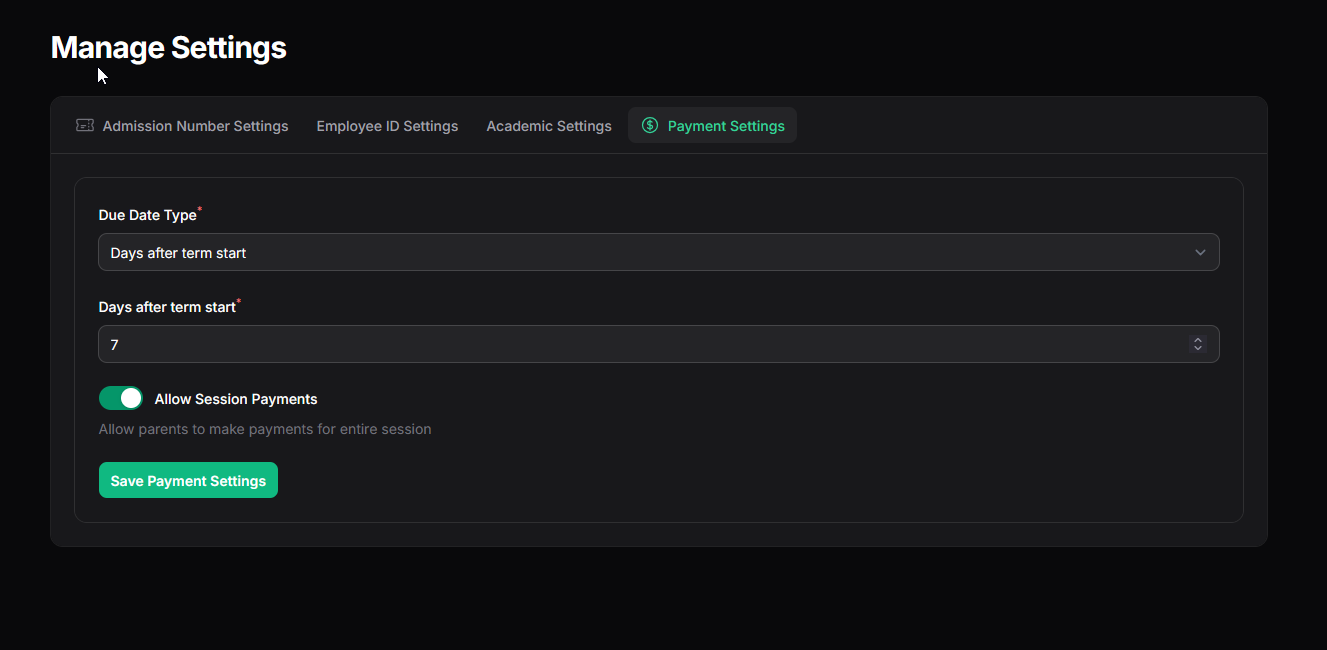
D. Payment Settings Tab
Defines default rules related to fee payments.
- Due Date Type*: Determines how the default due date for fees is calculated:
- Days after term start: Due date is calculated by adding a set number of days to the start date of the relevant term.
- Specific date: Allows setting a fixed due date (though this might need configuration elsewhere, this sets the type of rule).
- Days after term start*: (Visible if Due Date Type is 'Days after term start') Enter the number of days after the term begins when fees are typically due (e.g., 7).
- Allow Session Payments: Toggle ON (default) to permit parents/students to make a single payment covering the entire academic session's fees (if applicable payment plans exist). Toggle OFF to restrict payments strictly on a term-by-term basis.
- Save Payment Settings: Click this button to save changes made only on this tab.
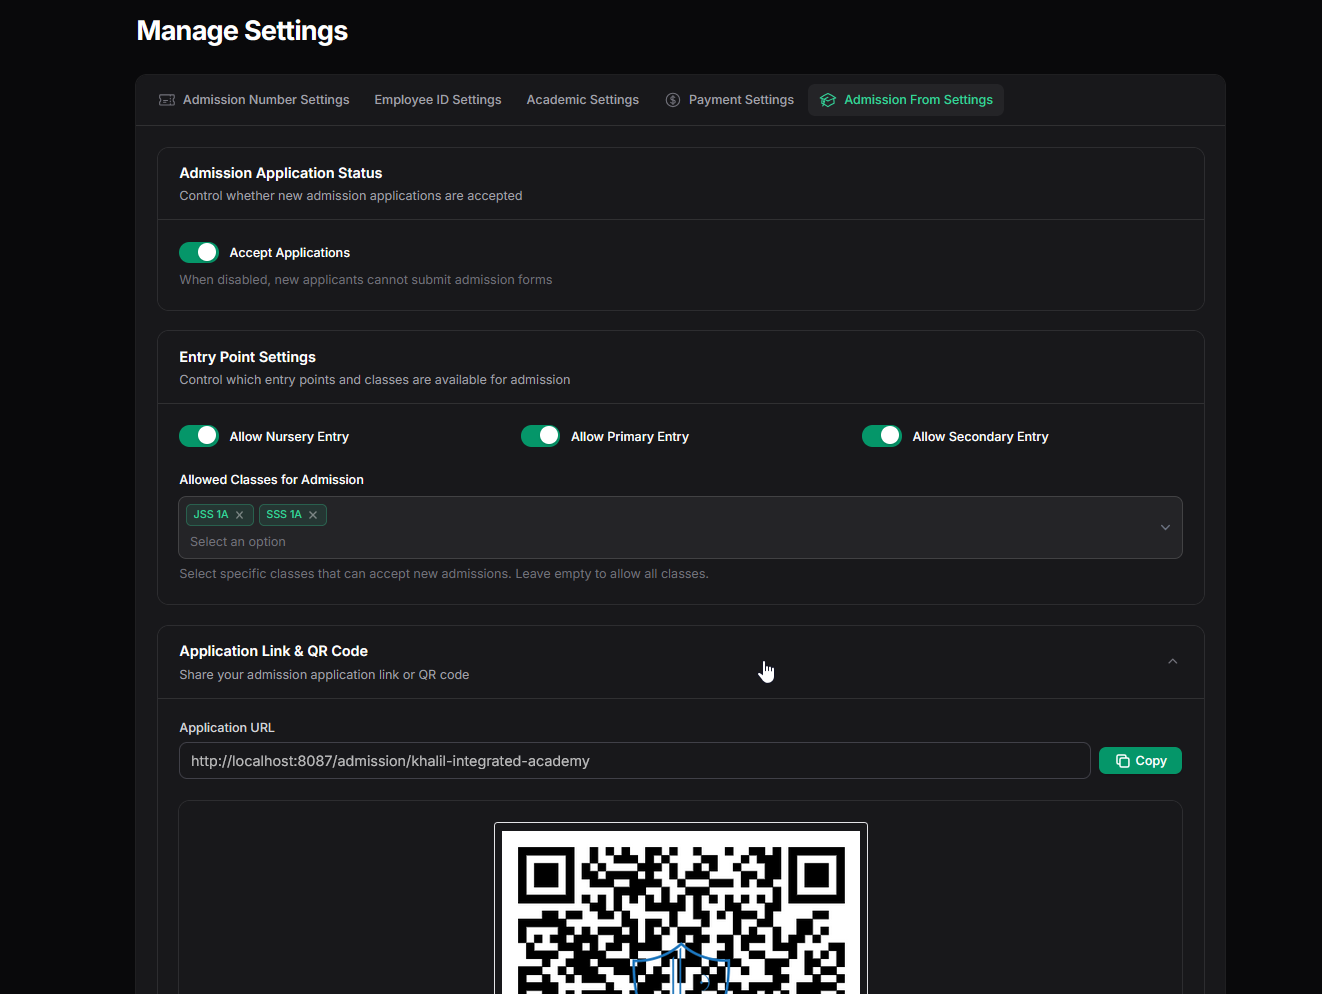
E. Admission Form Settings Tab
(Note: This tab and its features are typically available only for schools on Premium subscription plans.)
This tab controls the status and accessibility of your school's online admission application form.
- Admission Application Status Section:
- Accept Applications: Toggle this ON (default) to allow prospective students/parents to access and submit the online admission form. Toggle OFF to disable the form. Helper text: "When disabled, new applicants cannot submit admission forms".
- Display Message When Closed: Toggle to show a custom message on the admission page when closed.
- Closed Message: Enter the text to display (e.g., "Admissions for the 2024/2025 session are now closed. Please check back later or contact the school office.").
- Contact Email / Contact Phone: Optionally provide contact details for inquiries when admissions are closed.
- Entry Point Settings Section:
- Allow Nursery/Primary/Secondary Entry: Toggles to enable/disable applications for entire school levels.
- Allowed Classes for Admission: Multi-select to restrict applications to only specific classes within the enabled entry points. Leave empty to allow all classes in enabled levels.
- Application Link & QR Code Section:
- Provides the tools to share your online admission form.
- Application URL: Displays the unique web address for your school's admission form.
- Copy Button: Click this button to easily copy the Application URL to your clipboard for sharing online or via messages.
- QR Code: Displays a QR (Quick Response) code image that directly links to your Application URL. Prospective applicants can scan this code with their smartphones to access the form easily. The QR code often includes your school's logo embedded in the center.
- A button to Download QR Code as an image file (e.g., PNG) for use in printed materials (flyers, posters).
- Save Admission Status Settings: Click the relevant "Save" button on this tab to apply any changes made to the application status or related messages/contacts.
Recommendation:
Review and configure the Admission Number Settings and Employee ID Settings before adding students/staff. Adjust Academic and Payment settings to match policies. Use the Admission Status tab to control your online application intake periods and easily share the application link or QR code. Remember to save each tab individually.
On this page
On this page
Related Articles
Manage Your Subscription
Choosing and Subscribing to a PlanThis guide provides step-by-step instructions on how to view available subscription plans, choose the one that best...
How to Register Your School
Registering Your School AccountThis guide provides a step-by-step walkthrough of the Oraion school registration process. Follow these instructions to...
Getting Started
Oraion School Management System: Learning Path & Documentation GuideWelcome to Oraion! This guide provides a recommended path for learning how to...