Student Management
Last updated: Apr 13, 2025
Managing Student Records (Profiles)
Content:
This guide explains how to access, view, update, and manage the records of students who are officially enrolled in your school using the Oraion platform. Maintaining accurate student records is fundamental for daily operations, academic tracking, financial management, and communication.
Overview
- What are Student Records? Once an applicant is formally enrolled (via the Admissions module or direct creation), they have a dedicated Student Record. This record holds all essential information about the student throughout their time at your school.
- Why Manage Them? Accurate records ensure correct class placements, reliable communication with guardians, proper tracking of academic progress and fee payments, and compliant reporting.
- Where Data Comes From: Initial student data is populated from the approved Admission record. Subsequent updates (grades, attendance, payments, status changes) are added through various Oraion modules.
- Your Role: As an administrator, you are responsible for overseeing these records, ensuring data integrity, and performing key management tasks like promotions or status updates.
Accessing Student Records
To begin working with enrolled student data:
- Log in to your Oraion portal.
- Using the main sidebar on the left, expand the School Management module.
- Click on the "Students" sub-item.
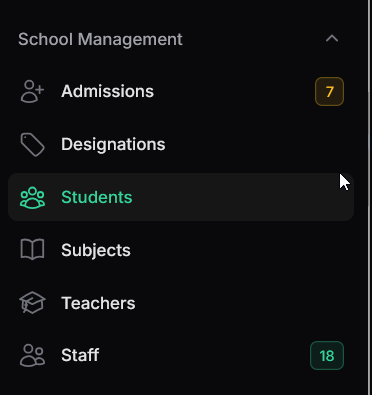
Navigate to the main Student list via the sidebar.
Managing Student Records
- Working with the Student List:
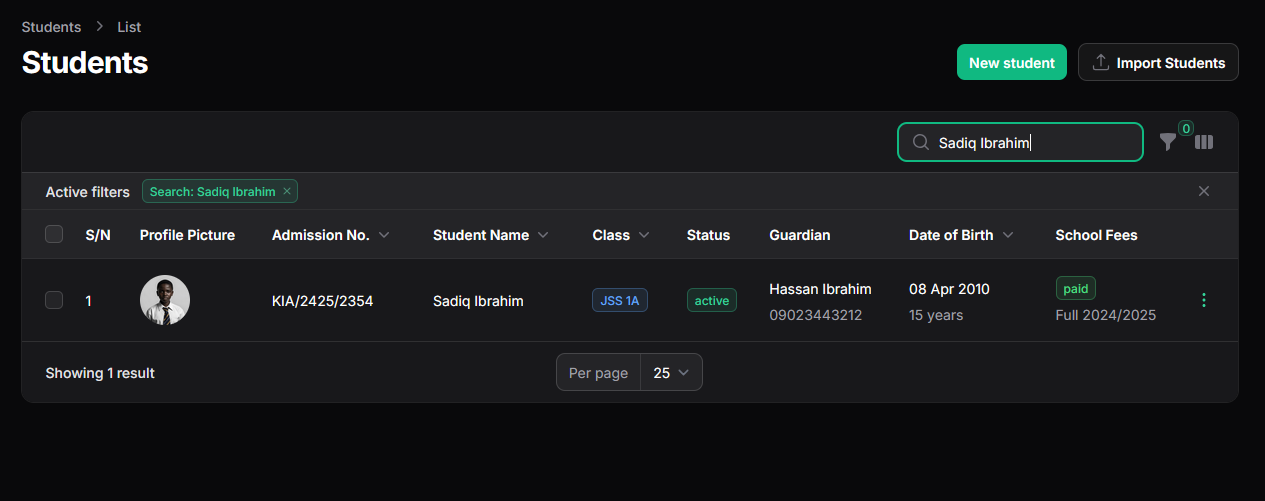
- Upon accessing the "Students" section, you are presented with a table listing all currently enrolled students.
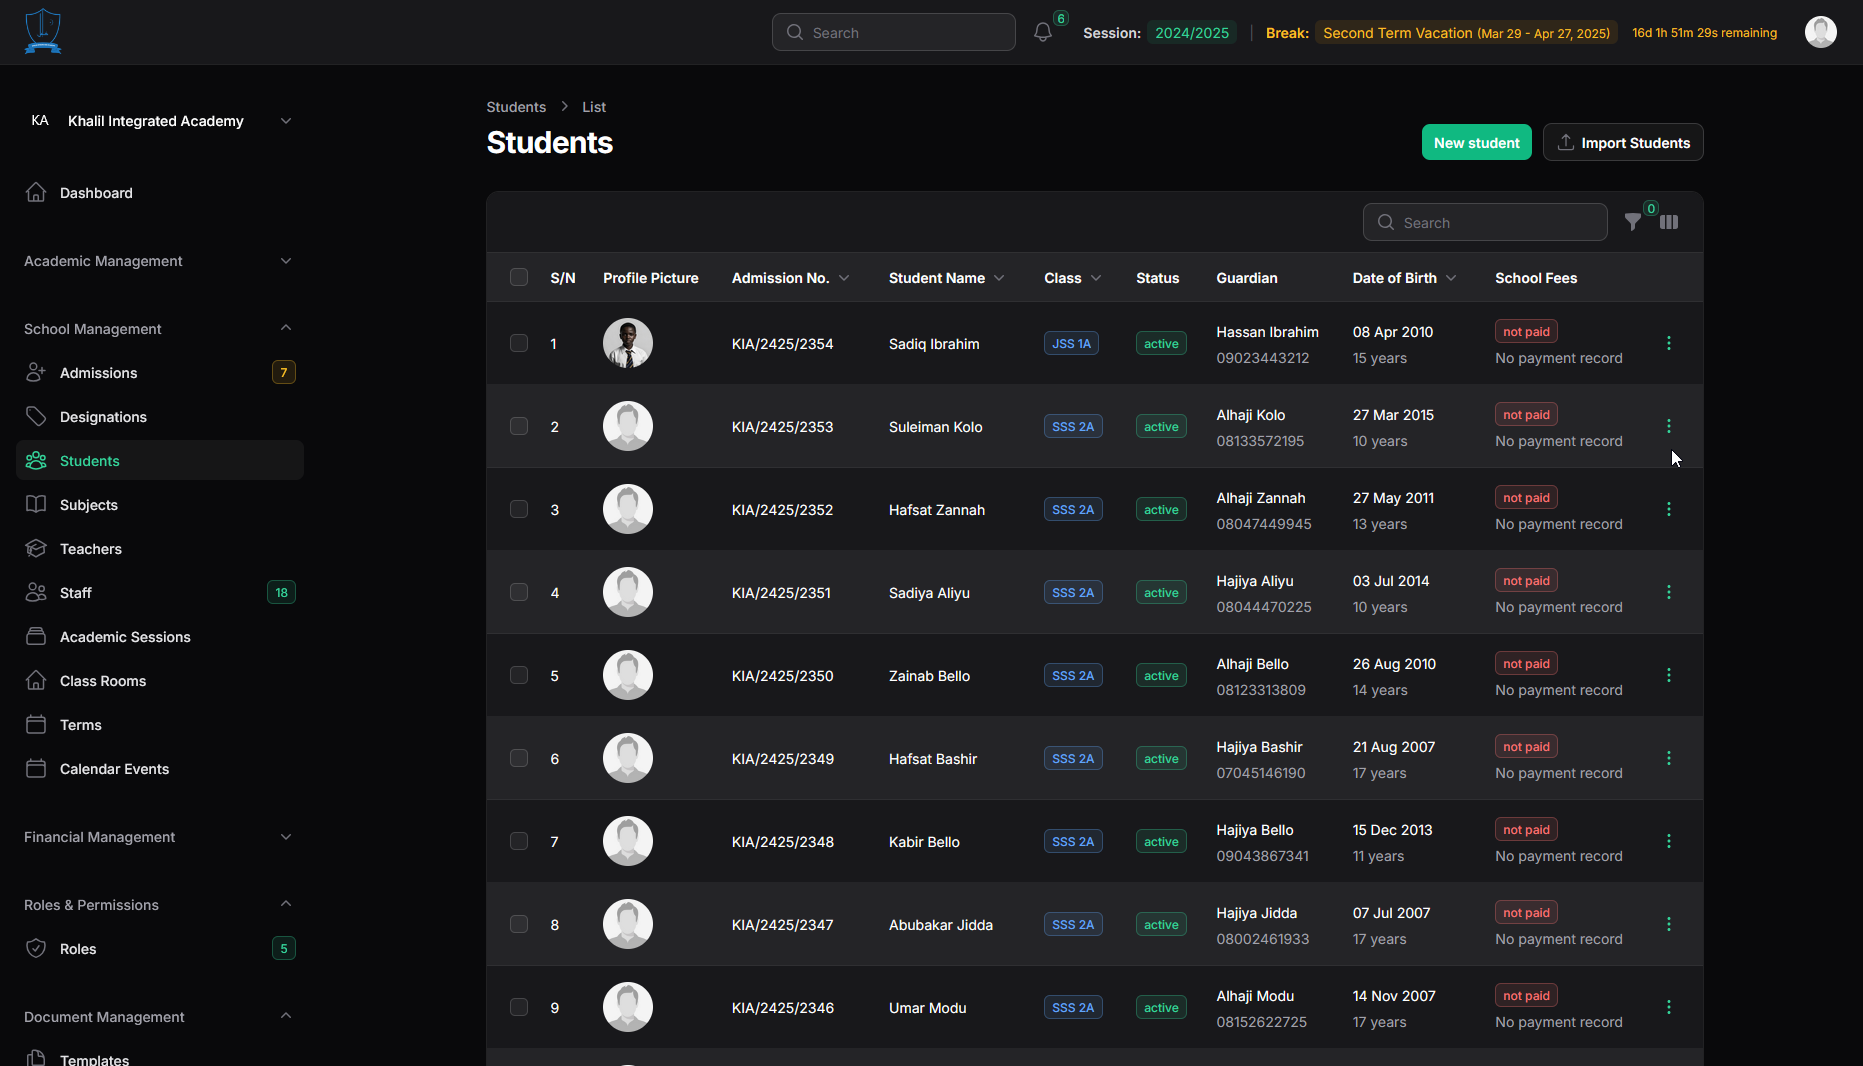
The main Students list provides an overview of your enrolled student population.
- Upon accessing the "Students" section, you are presented with a table listing all currently enrolled students.
- Understanding the Information: Review key details directly from the list. Default columns typically include S/N, Profile Picture, Admission No., Student Name, Class, Status, Guardian details, Date of Birth/Age, and School Fees status.
- Customizing Your View: If you need to see different information, click the Toggle columns (|||) icon (top right of the table) to select which columns are displayed.
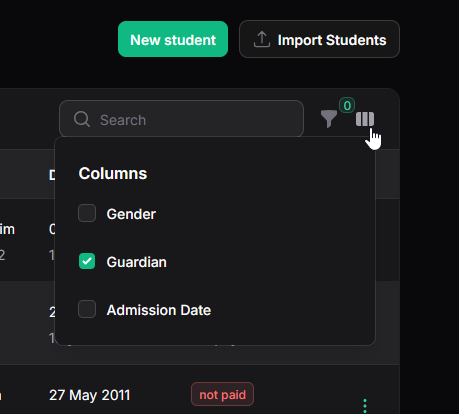
Customize the list view by selecting the columns most relevant to your task. - Finding Specific Students:
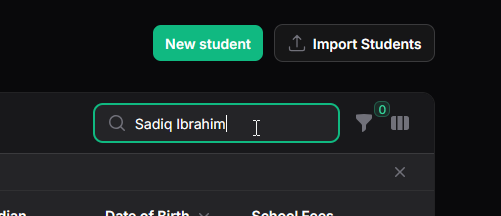
- Use the Search bar at the top right of the table to quickly locate a student by typing their name, admission number, or other keywords.
- For more refined searches, click the Filter (funnel) icon. This allows you to narrow the list based on criteria like specific Class, Gender, enrollment Status (Active, Inactive, etc.), Tuition Payment Status, or the date range when students were Admitted. Apply the desired filters to focus on a specific group. Remember to click Reset within the filter panel to clear selections.
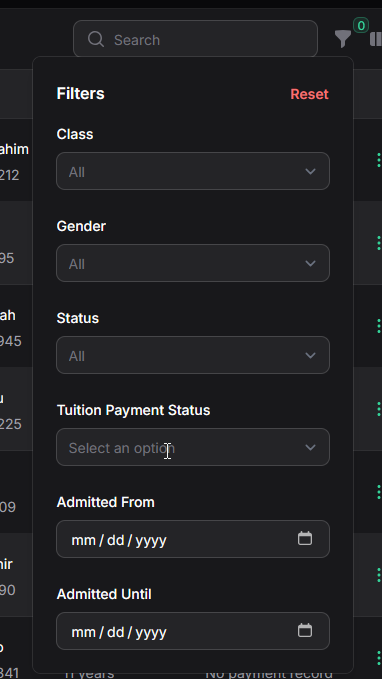
Apply filters to analyze specific segments of your student population. - Adding and Importing: Use the New student button to add students individually, or the Import Students button for bulk uploads (explained further below).
- Viewing a Detailed Student Profile (View action):
- Purpose: To see a comprehensive, read-only summary of a single student's entire record.
- How to Use: Find the desired student in the list, click the three-dot action menu (...) at the end of their row, and select View.
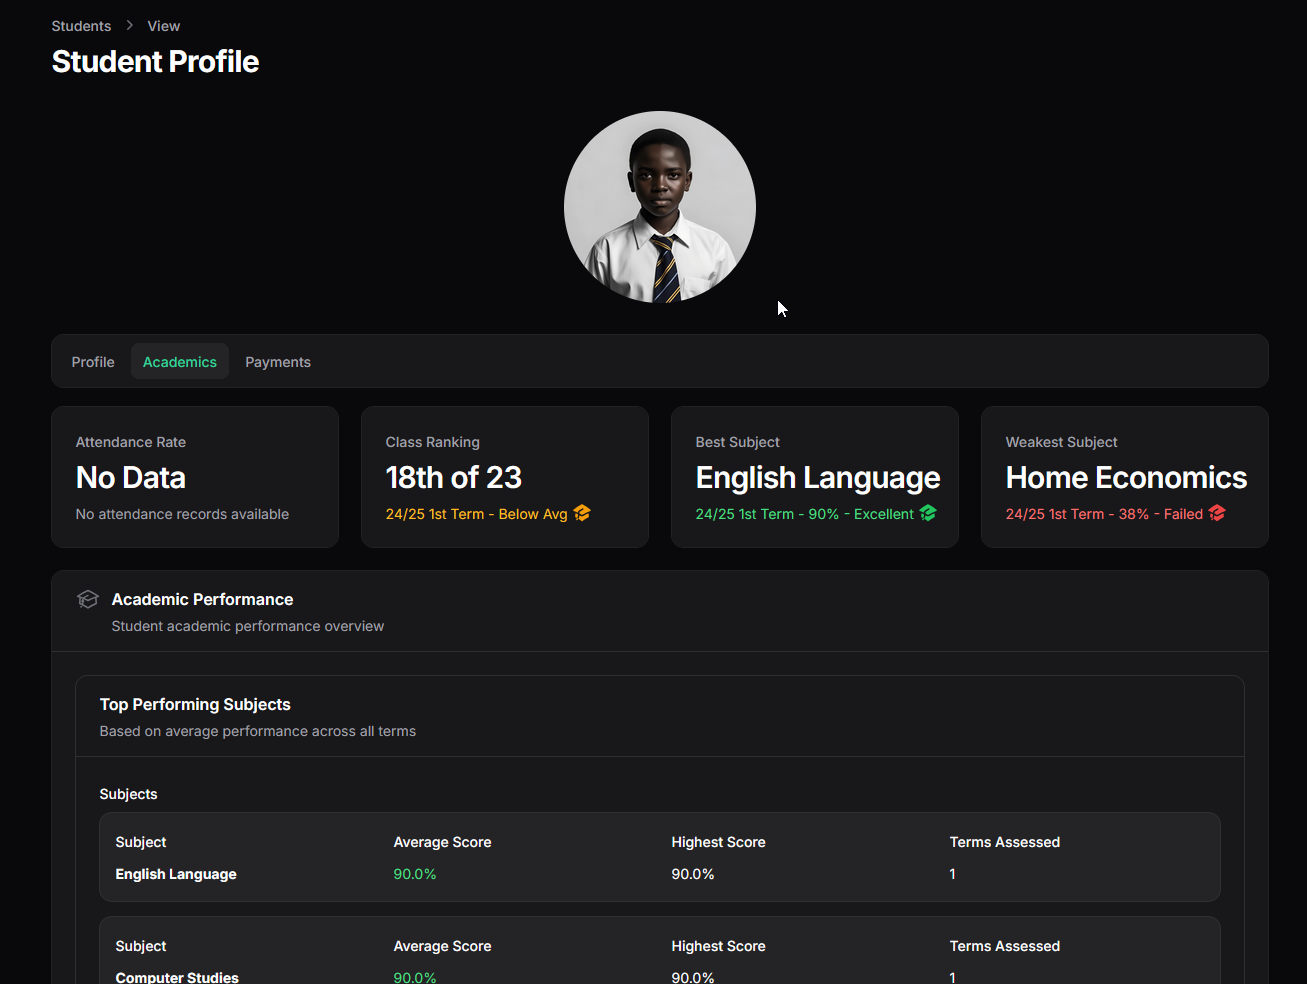
- The "Student Profile" page opens, typically organizing information into tabs:
- Profile Tab: Shows core personal, contact, academic (class, admission dates), and medical details.

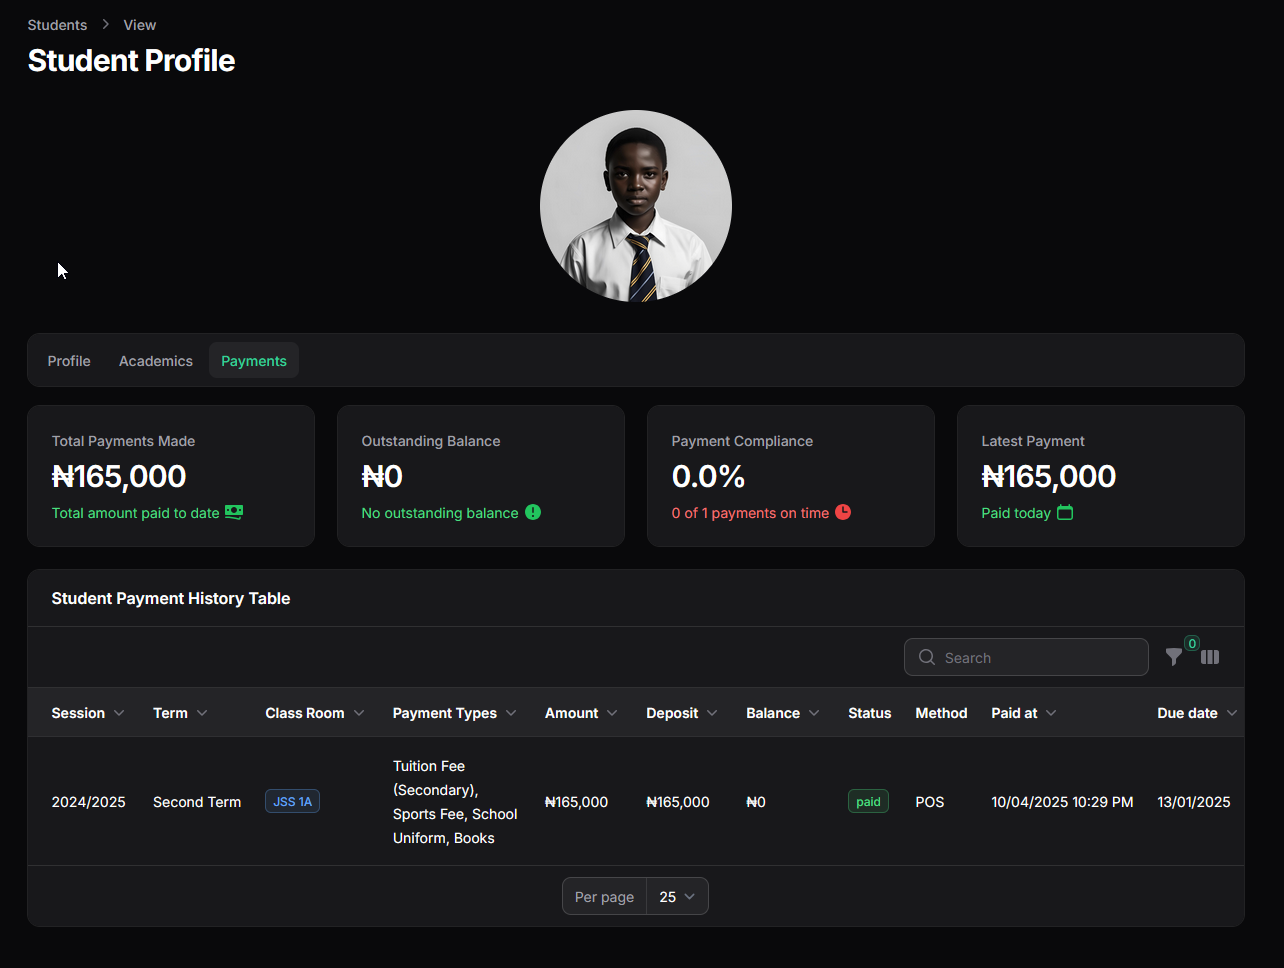
- Payments Tab: Summarizes the student's financial status (total payments, balance, compliance) and lists their detailed payment history in a table.
- Editing a Student Record (Edit action):
- Purpose: To correct or update information in a student's record.
- How to Use: From the student list's row action menu, select Edit. This opens the multi-step student information wizard, pre-filled with their existing data. Navigate through the steps (Personal Information, Personal Information 2, etc.) to modify details like phone numbers, addresses, guardian contacts, or medical information. After making all necessary changes, click "Save changes" on the final step. (Note: Class changes are done via "Promote").
action mneu
- Adding Existing Students Directly (New student button):
- Purpose: This option is primarily intended for adding students who are already part of the school but whose records were not previously entered via the formal Admissions module (e.g., migrating data from a previous system one by one). For new applicants, using the Admissions module is recommended.
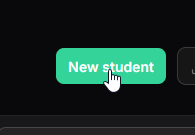
add new student button
- Purpose: This option is primarily intended for adding students who are already part of the school but whose records were not previously entered via the formal Admissions module (e.g., migrating data from a previous system one by one). For new applicants, using the Admissions module is recommended.
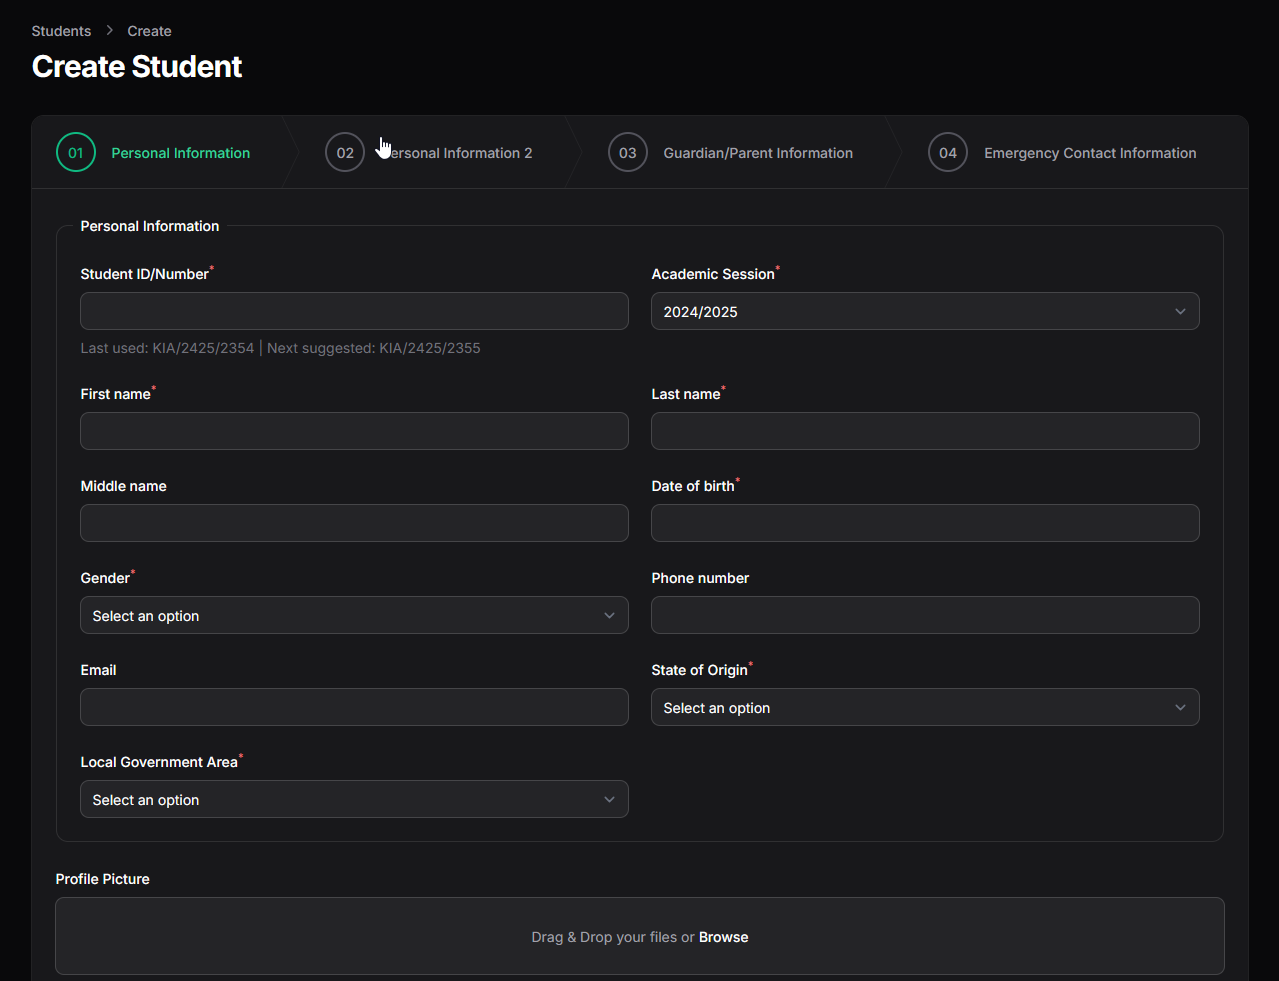
- How to Use:
- Click "New student".
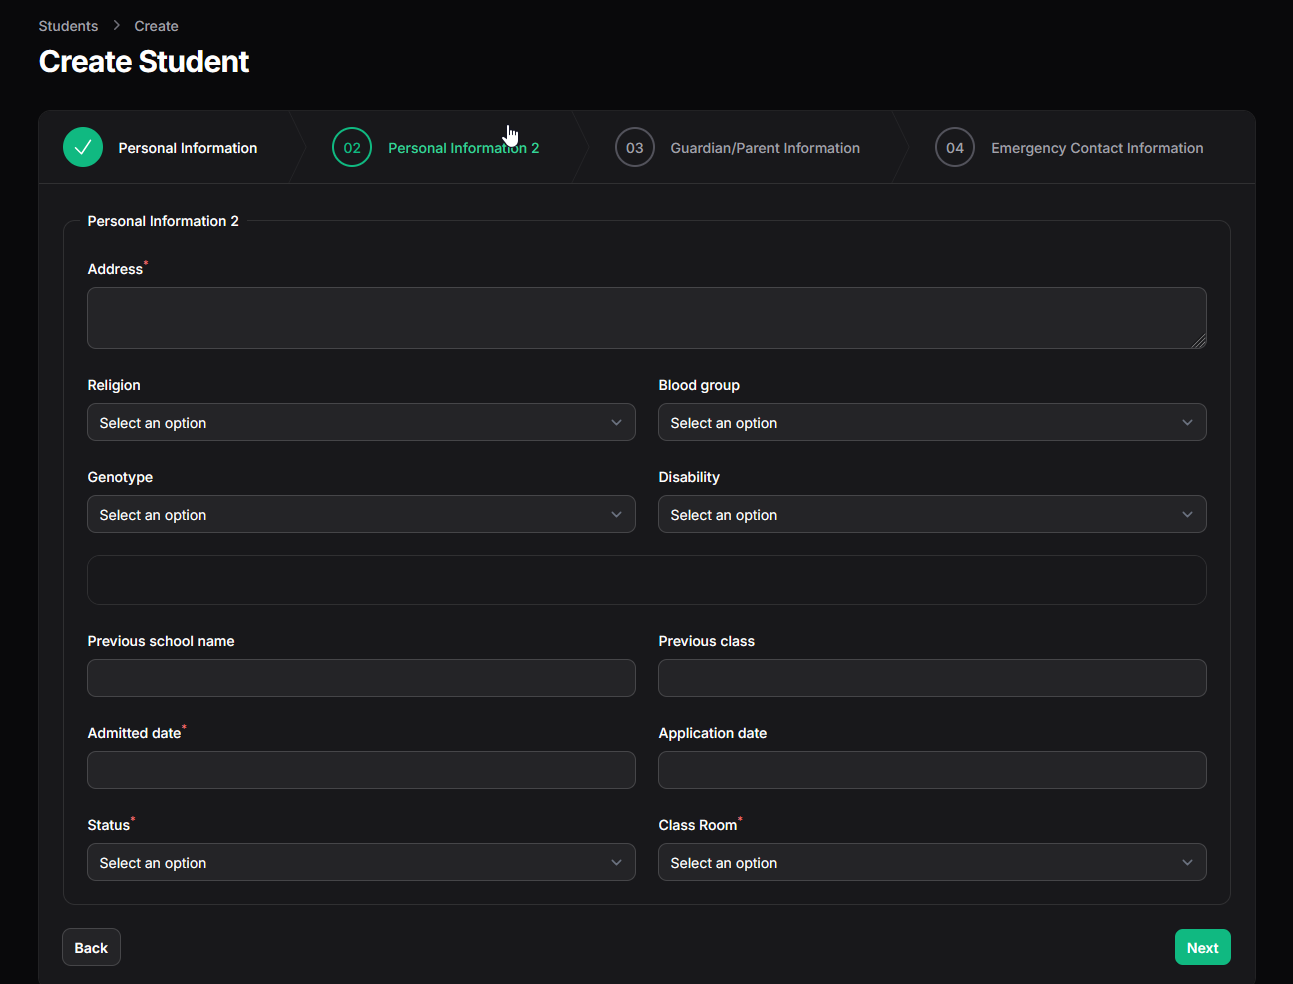
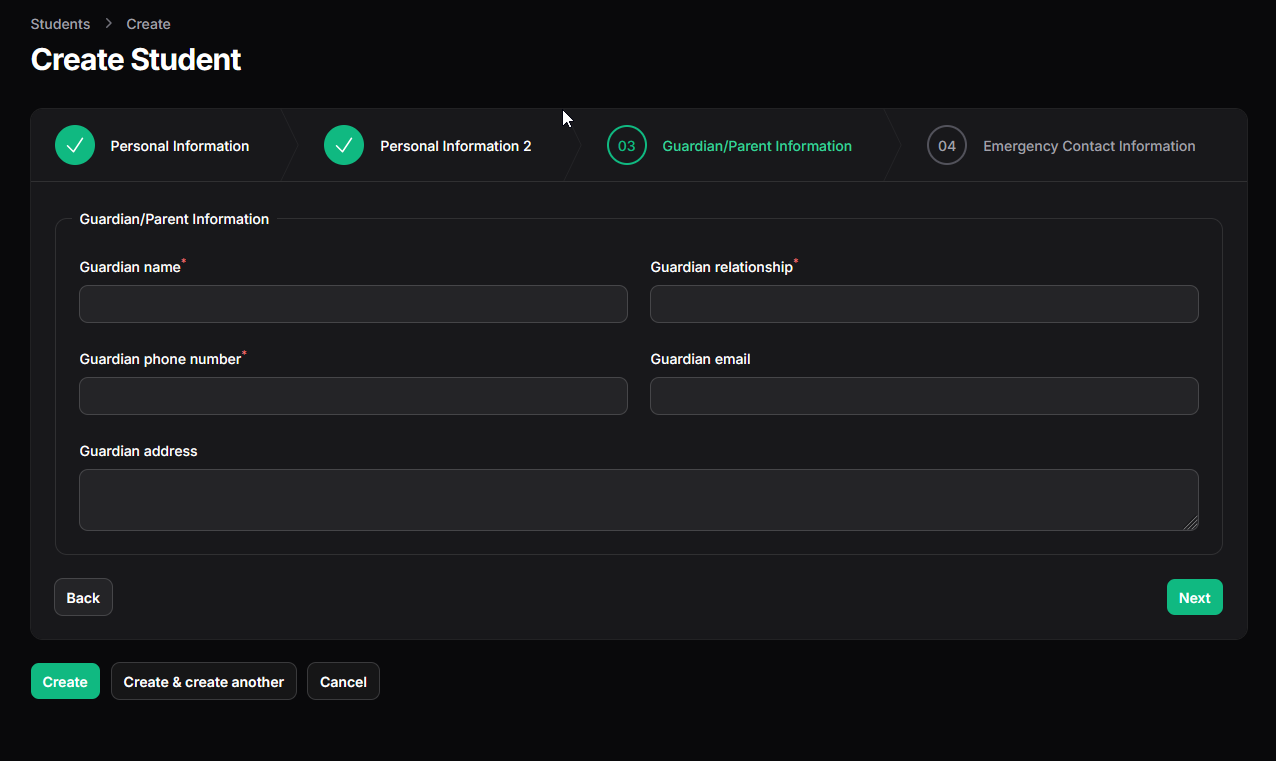
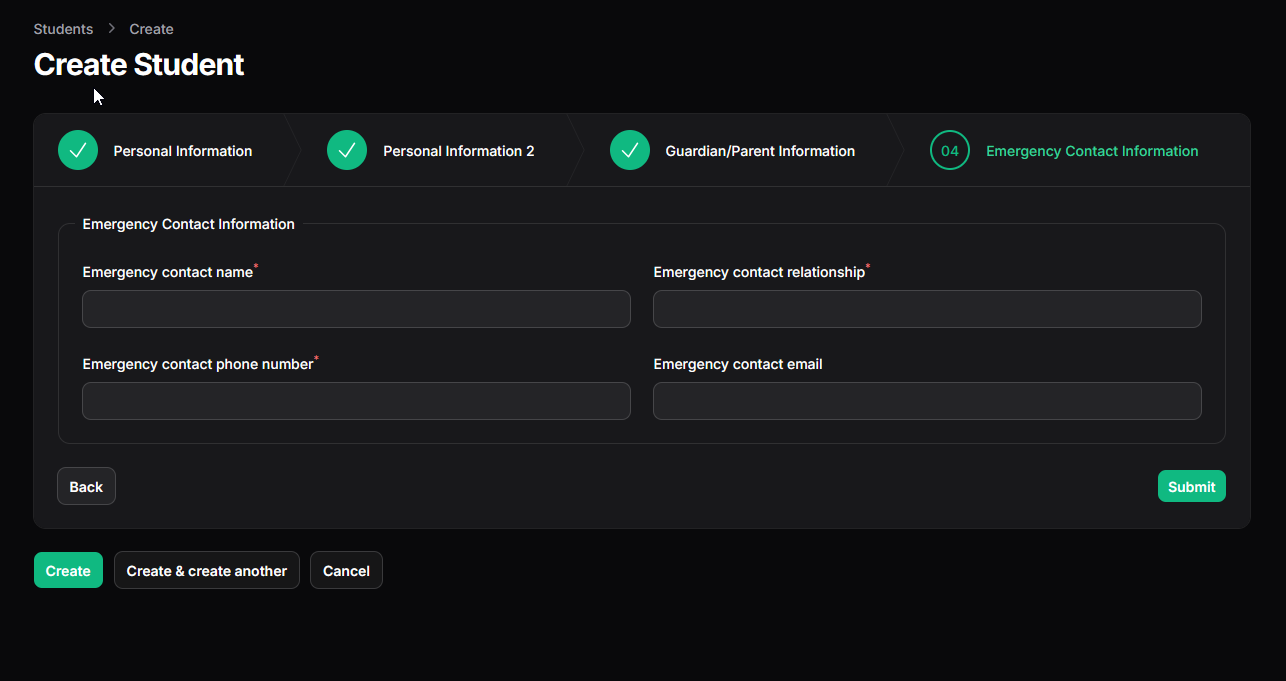
- Complete the 4-step wizard (Personal Information, Personal Information 2, Guardian/Parent Information, Emergency Contact Information). The fields are identical to the Admission creation wizard.
- Crucially: Assign the correct Classroom and set the Status ( 'Active') in Step 2. Provide the existing Student ID/Number (Admission Number) in Step 1.
- Click "Submit". This creates both the Student record and a corresponding background Admission record.
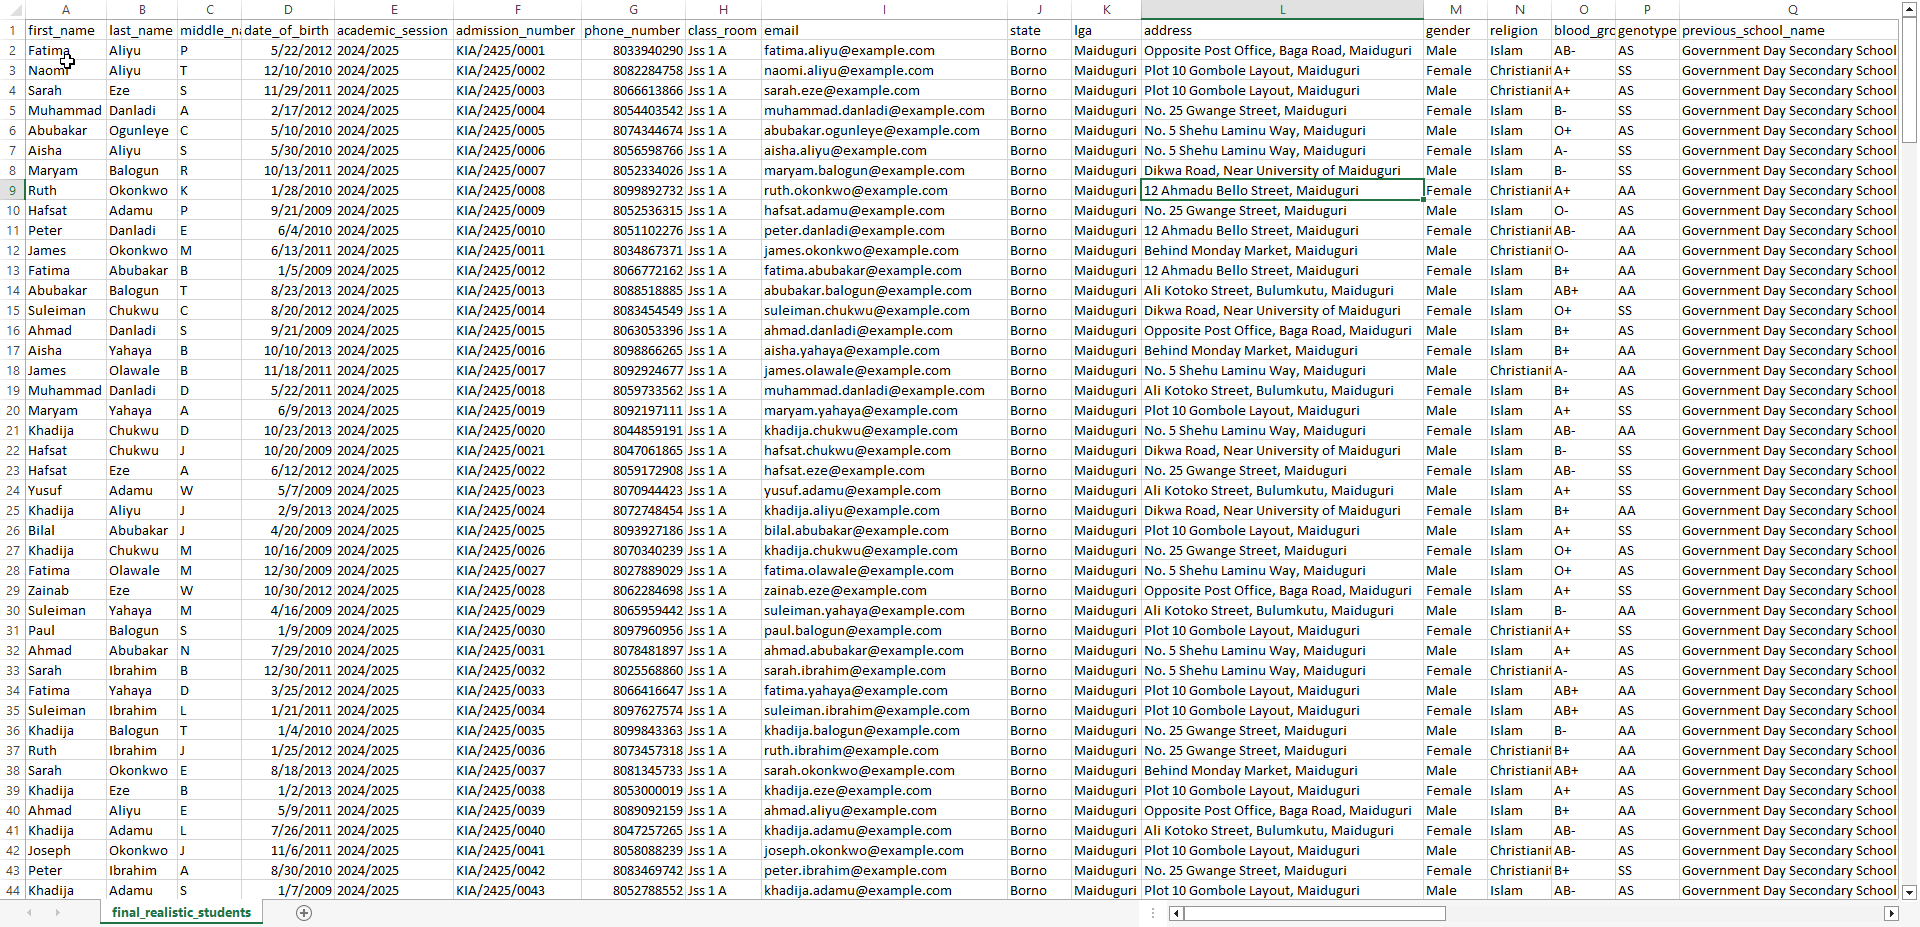
- Importing Existing Students (Import Students button):
- Purpose: The most efficient way to add multiple existing students into Oraion, especially when migrating from another system or setting up initially. Recommended for adding entire classes at once.
- How to Use:
- Click "Import Students".
- In the "Import Students" modal, click "Download example CSV file".
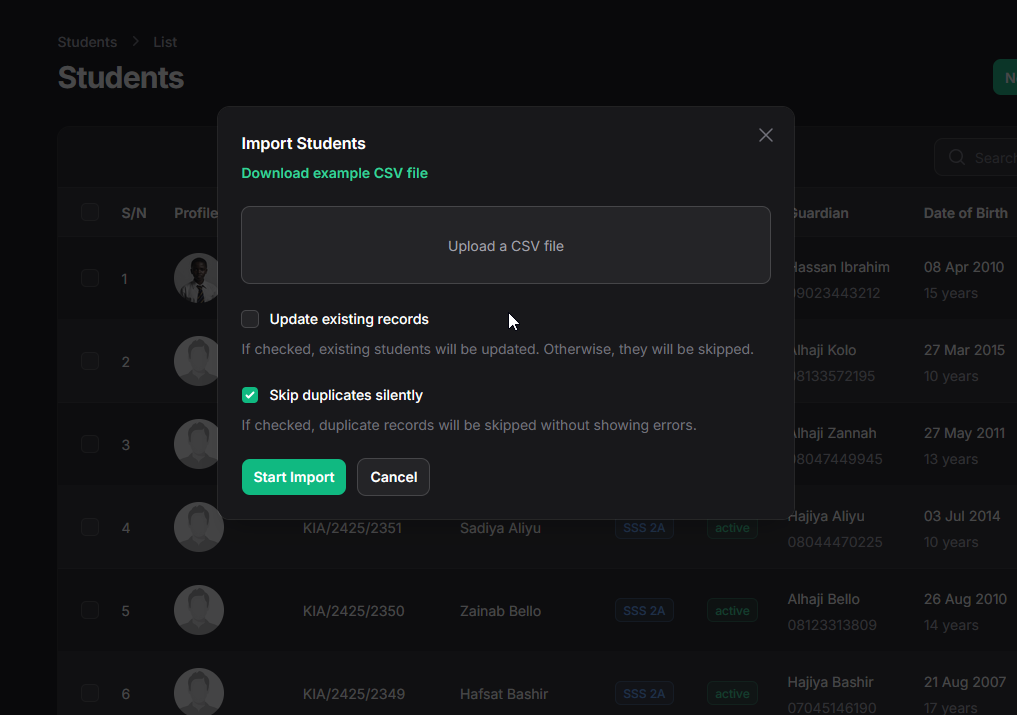
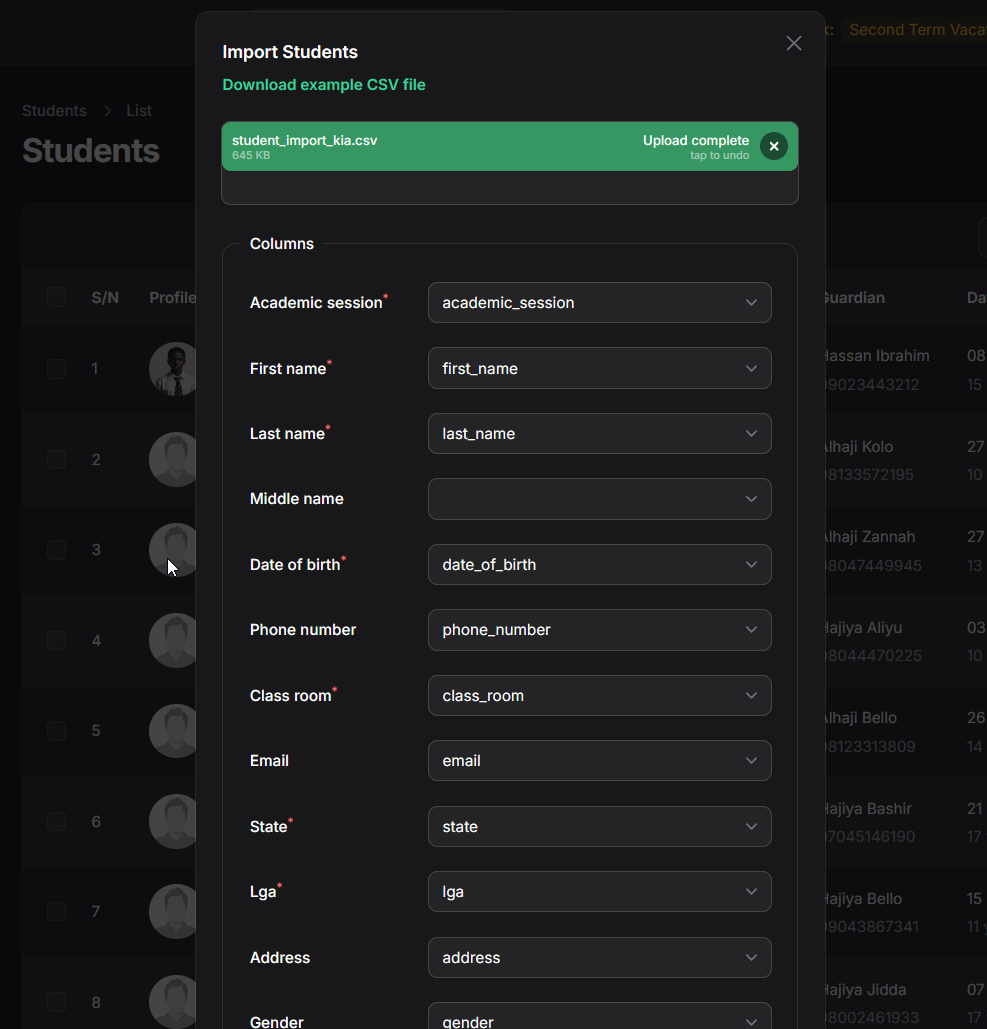
- Import Options:
- Update existing records: If checked, rows in your CSV with an Admission Number that already exists in Oraion will update the existing student record with the data from the CSV. If unchecked, existing students are skipped.
- Skip duplicates silently: If checked (and 'Update existing' is unchecked), rows matching existing students are simply ignored without generating individual errors, making the import summary cleaner.
- Start Import: Click the "Start Import" button.
- Background Processing: The import process will run in the background. You can navigate away from the page or continue working elsewhere in Oraion. This is especially useful for large files.
- Notification on Completion: Once the import process finishes, you will receive a system notification (check the bell icon in the top bar). This notification summarizes the results, indicating how many records were successfully created, how many were updated (if selected), how many were skipped (if duplicates were ignored), and how many failed due to errors in the data or mapping. Review this notification carefully. If there were failures, you may need to correct your CSV file and re-import the failed rows.
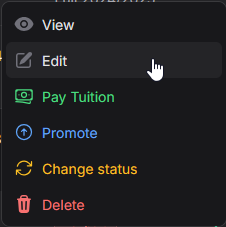
Detailed Row Actions (Promote, Change Status, Pay Tuition):
- The three-dot menu (...) on each student row provides shortcuts for important management tasks beyond viewing and basic editing.

Student list row actions menu - Recording Tuition Payments (Pay Tuition):
- When to Use: Use this action when a guardian pays specifically for the student's tuition fees for a given term or session.
- Permissions: Requires financial roles (e.g., Accountant).
- Process:
- Select Pay Tuition.
- The "Record Tuition Payment" modal opens, pre-filled with the student's name and class.
- Verify/Select the correct Academic Session and Term the payment applies to.
- Choose the Payment Method used by the payer.
- Select the Payment Plan: Choose 'Full Session Payment' or 'Term Payment'. The corresponding total Amount due will automatically load based on the student's class level and the selected plan type (configured in Financial Management > Payment Plans).
- Enter the Amount to Pay (Deposit). If partial payments are not enabled (toggle is off or hidden), this usually must equal the full Amount. If partial payments are enabled, you can enter a lesser amount (check if a minimum installment applies). The Balance will calculate automatically.
- Confirm/Enter the Payer Name and Payer Phone.
- Verify the Payment Date (defaults to now).
- Click Submit. A payment record is created, and the student's "School Fees" status on the list view should update accordingly (e.g., to 'paid' or 'partial'). A success notification often includes a link to view the generated receipt.
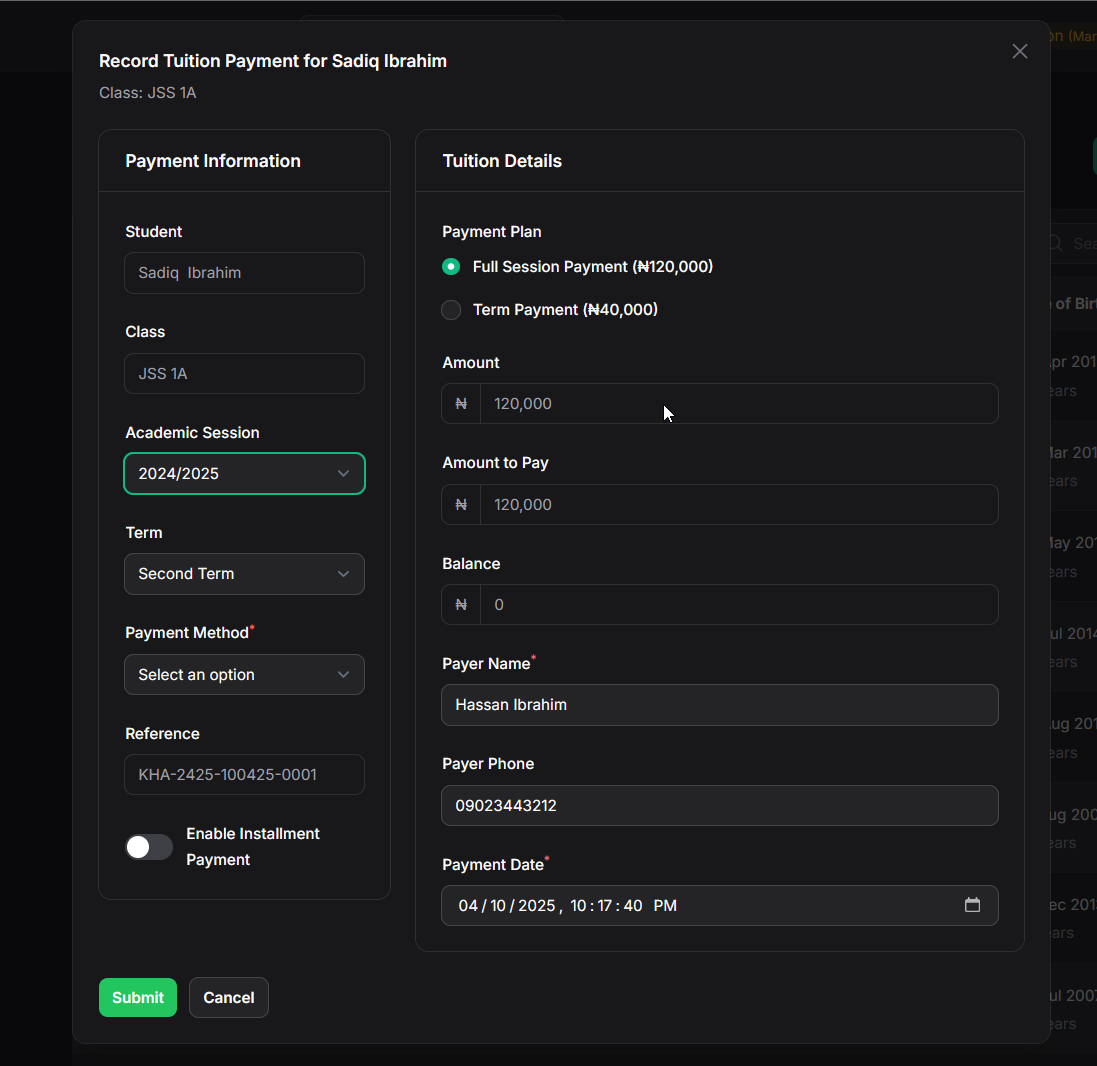
Efficiently record tuition payments, selecting the appropriate plan and payment details. - Promoting Students (Promote):
- When to Use: Typically used at the end of an academic session to move students to the next class level for the upcoming session. Can also be used for mid-session class changes if necessary.
- Permissions: Requires academic administration permissions.
- Process:
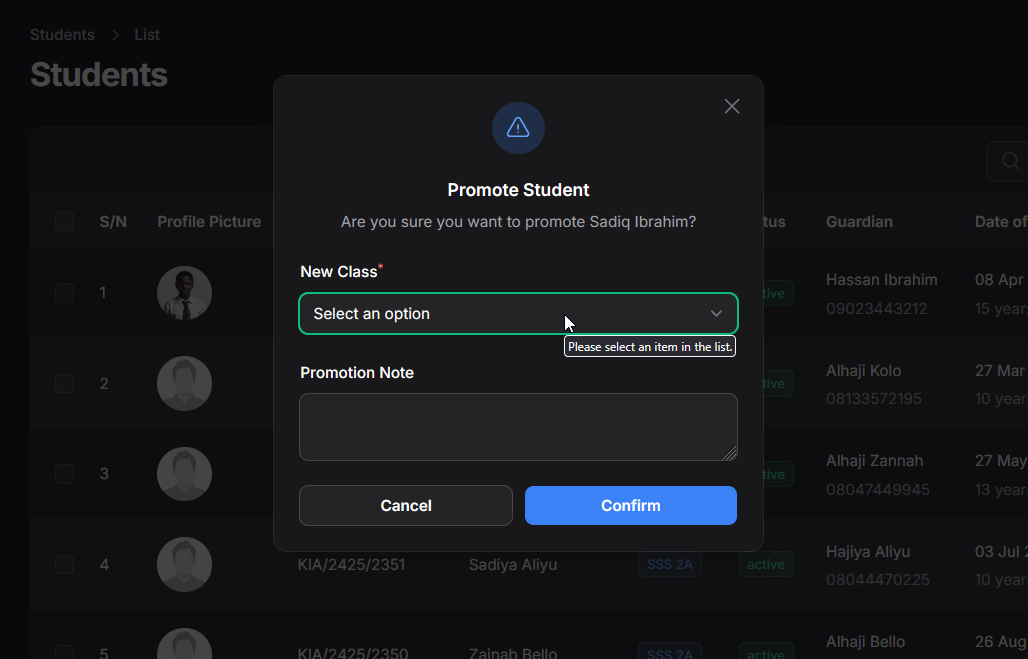
- Select Promote.
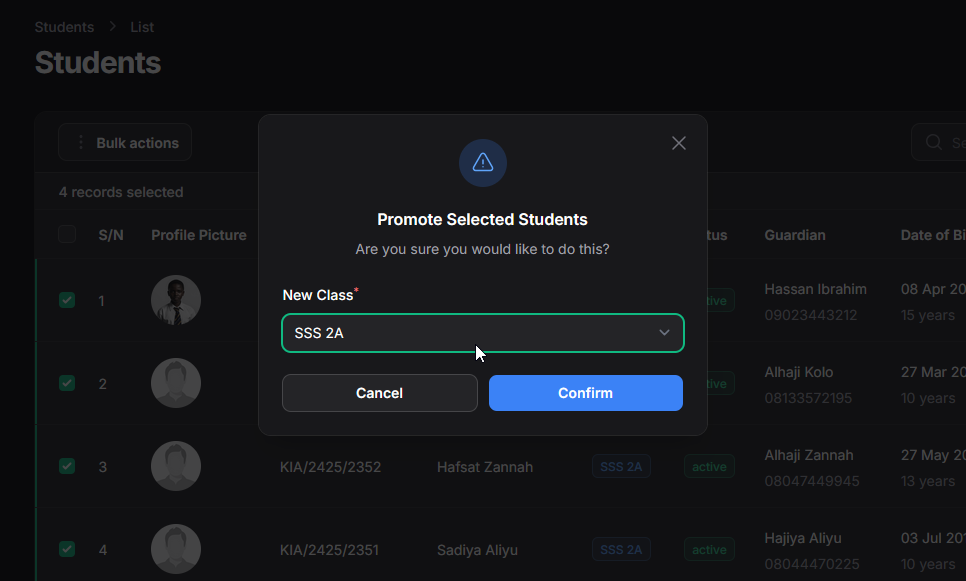
- The "Promote Student" modal appears, confirming the student's name.
- Select the New Class the student is moving into from the dropdown list. Ensure you select the correct class and section for the next academic session.
- Enter a brief Promotion Note (optional but recommended, e.g., "Promoted to SSS 2A for 2025/2026 Session").
- Click Confirm. The student's assigned class_room_id is updated, and a record of this promotion is logged in the system (likely under Student Movement history).
- Changing Enrollment Status (Change status):
- When to Use: To officially update a student's enrollment standing when they leave the school (Withdrawal, Transfer, Graduation), become inactive, or face disciplinary action (Suspension, Expulsion). This is the preferred method over deleting records.
- Permissions: Requires administrative permissions.
- Process:
- Select Change status.
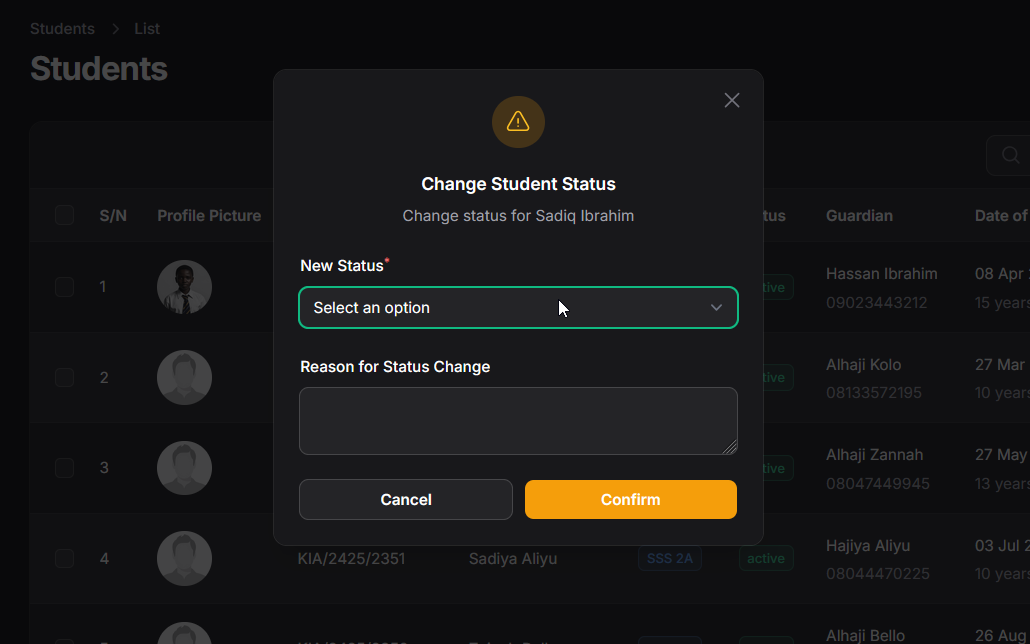
- The "Change Student Status" modal appears, confirming the student's name.
- Select the appropriate New Status from the dropdown (e.g., 'Withdrawn', 'Graduated', 'Transferred Out', 'Suspended', 'Inactive').
- Enter a clear Reason for Status Change. This is crucial for record-keeping.
- Click Confirm. The student's status badge on the list view will update, and they may be excluded from certain active lists or reports depending on the new status. Their historical data remains accessible.
Content:
For managing larger groups of students efficiently, Oraion provides Bulk Actions that allow you to import data, promote classes, or update statuses for multiple students simultaneously.
Overview
- Purpose: To save time and ensure consistency when applying the same action (like promotion, status change, or initial data entry) to many students at once.
- Access: Bulk actions are accessed from the main "Students" list view after selecting multiple students using checkboxes.
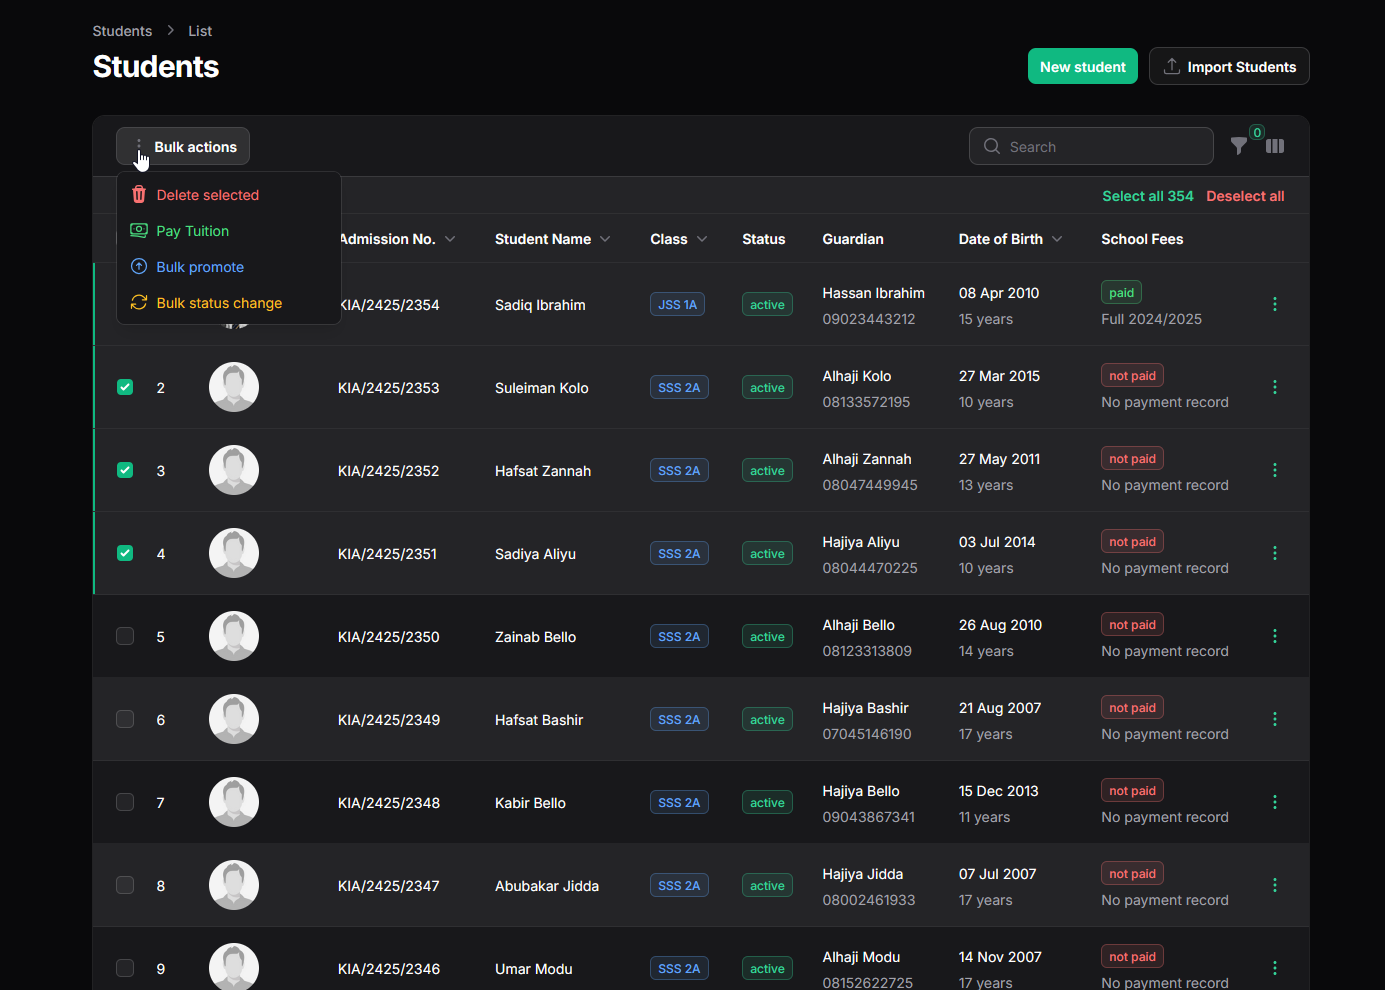
- Key Bulk Actions: Actions include Importing new students, Bulk Promoting selected students, Bulk Changing Status, Bulk Tuition Payment (based on permissions), and Bulk Deleting.
Using Bulk Actions
- Navigate to the Student List: Go to School Management > "Students".
- Select Students: Check the boxes next to the names of the students you want to apply an action to. Use the checkbox in the header row to select all students currently visible on the page.
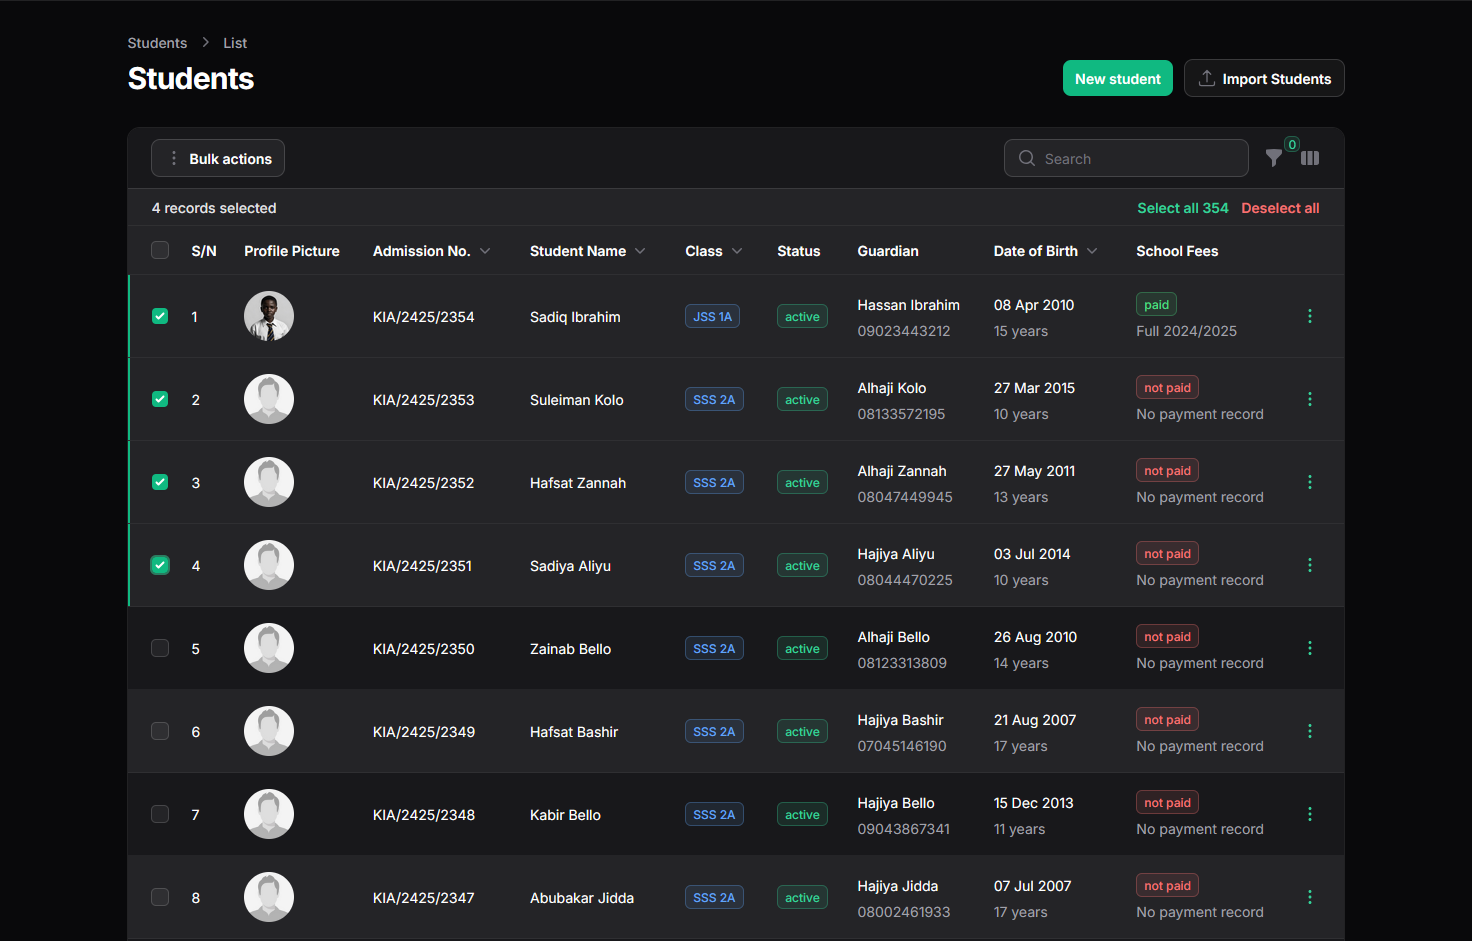
- Access Bulk Actions Menu: Once students are selected, a "Bulk Actions" button or dropdown menu appears near the top of the table. Click this button/menu.
Common Bulk Actions Explained
- Bulk Promote (bulkPromote):
- Purpose: To promote a selected group of students (e.g., an entire class) to their next class level.
- Process:
- Select the students to promote.
- Choose "Bulk Promote" from the Bulk Actions menu.
- In the modal, select the single New Class for all selected students.
- Click Confirm. The assigned class for all selected students is updated, and the promotion is logged.
- (Reference Screenshot: Use the 'Promote Student' modal.)
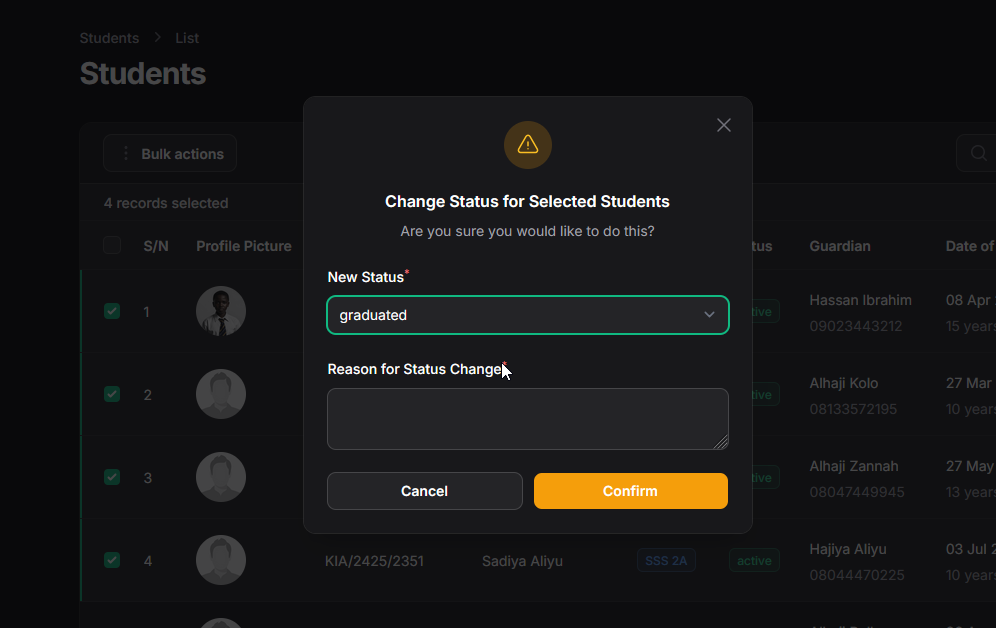
- Bulk Status Change (bulkStatusChange):
- Purpose: To apply the same enrollment status update to multiple students (e.g., graduating a class, marking several as inactive).
- Process:
- Select the relevant students.
- Choose "Bulk Status Change" from the Bulk Actions menu.
- In the modal, select the New Status that will be applied to all selected students.
- Enter a mandatory Reason for Status Change (this reason applies to all).
- Click Confirm. The status of all selected students is updated.
- (Reference Screenshot: Use the 'Change Student Status' modal.)
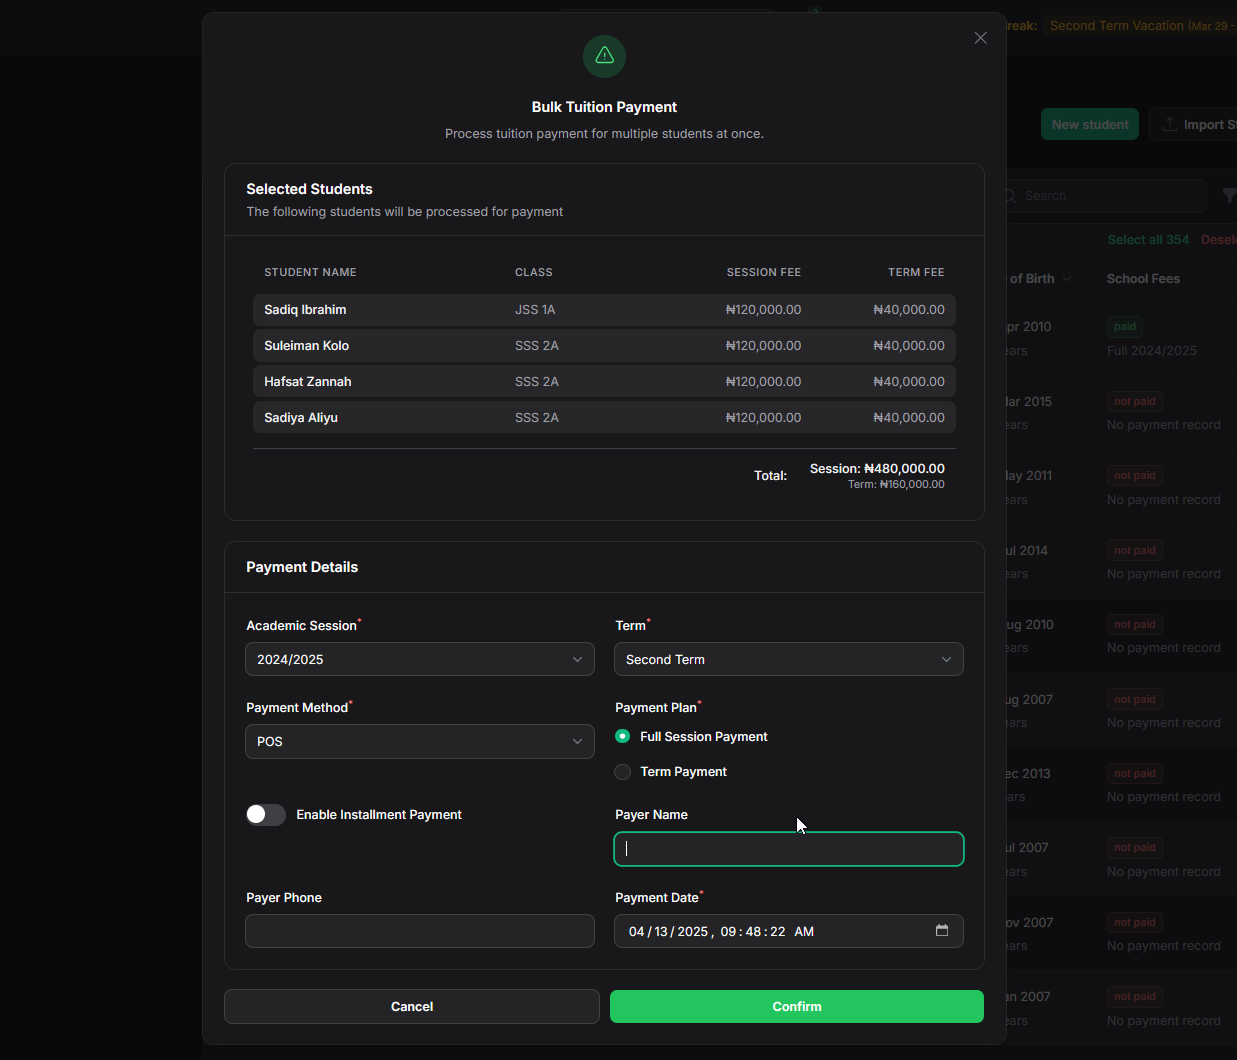
- Purpose: To record tuition payments for multiple students at once, useful for batch processing.
- Permissions: Requires financial roles.
- Process:
- Select the students.
- Choose "Pay Tuition" or "Bulk Tuition Payment" from the Bulk Actions menu.
- In the modal, select the common Payment Method, Academic Session, Term, and Payment Plan Type (Session/Term) for the batch.
- Enter shared details like Payer Name (if applicable) and Payment Date.
- Confirm the action. The system processes individual payments for each selected student based on their class level's tuition amount for the chosen plan type. (Note: Partial payment options might be less flexible in bulk mode compared to individual payment recording).
- Purpose: Permanently removes multiple selected student records and their associated data.
- Usage: USE WITH EXTREME CAUTION. This action is irreversible. For students leaving the school, always use Bulk Status Change to mark them as 'Inactive', 'Withdrawn', 'Graduated', etc., to preserve historical data. Only use Bulk Delete for cleaning up large numbers of records created entirely in error. Confirmation is required before deletion proceeds.
- Key Points:
- The Student Profile (View action) provides a comprehensive, tabbed overview of each student.
- Use Edit for modifying existing records.
- Use New student primarily for adding individual existing students not processed via Admissions.
- Use Import Students for bulk migration of existing student data, preferably class by class, using the provided CSV template.
- Manage student lifecycle events (promotions, withdrawals) using the dedicated row actions (Promote, Change status).
- Bulk actions streamline managing groups of students.
- Always verify your student selection before initiating a bulk action.
- Carefully review parameters in confirmation modals before proceeding.
- Prefer changing status over deleting records for students leaving the school.
- Using bulk actions correctly significantly improves administrative efficiency for managing student records, promotions, and status updates.
On this page
On this page
Related Articles
Classes Management
Managing Classes & Sections (Classrooms)Classrooms in Oraion represent the specific academic groups or sections where students are placed (e.g., "...
Subjects Management
Managing SubjectsSubjects represent the core academic disciplines taught at your school (e.g., Mathematics, English Language, Physics, Al Quran). Defi...
Teachers Management
Managing Teacher Assignments (Teachers View)While general staff information is managed under the "Staff" section, Oraion provides a dedicated "Teacher...