Admissions
Last updated: Apr 13, 2025
Student Admissions
Content:
The Admissions module in Oraion is where school administrators manage the process of enrolling new students, either through an online application form or by manually entering applicant details, before formally enrolling them into the school system.
Overview
- Purpose: To track prospective students, manage application statuses, assign admission numbers, communicate decisions, and transition approved applicants into enrolled student records.
- Application Methods:
- Online Form: (Note: Available primarily for schools on Premium subscription plans.) Allows parents/applicants to apply directly via a unique web link/QR code.
- Manual Entry: Available on all plans. School staff can input application details directly into the system.
- Workflow: The typical process involves:
- Receiving an application (status usually starts as 'Pending').
- Reviewing the applicant's details.
- Updating the application status (e.g., 'Approved', 'Rejected').
- Assigning an Admission Number upon approval.
- Optionally sending an Admission Letter via email.
- Enrolling the student, which creates their active student record in the system.
- Notifications: Upon successful application submission (both online and manual, if email is provided), the system automatically sends email confirmations: one to the applicant with their reference ID, and another to designated school administrators alerting them to the new application.
- Configuration: Key settings like online admission availability, allowed entry points/classes, and admission number formats are managed in the main "Settings" area. Admission letter content is defined under "Document Management".
A. The Online Application Process (Applicant Experience - Premium Feature)
Note: This section describes the process for schools using the Online Admission feature, typically available on Premium plans. If your school does not use the premium plan, skip to Section B.
- Accessing the Form: Prospective parents/students can find the application form in two main ways:
- Direct Link/QR Code: Using the unique Application URL or by scanning the QR code provided directly by the school (found by admins in Settings > Admission Form Settings).
- Schools Directory: By visiting oraion.app/schools, finding your school in the directory listing, and clicking the "Apply Now" button.
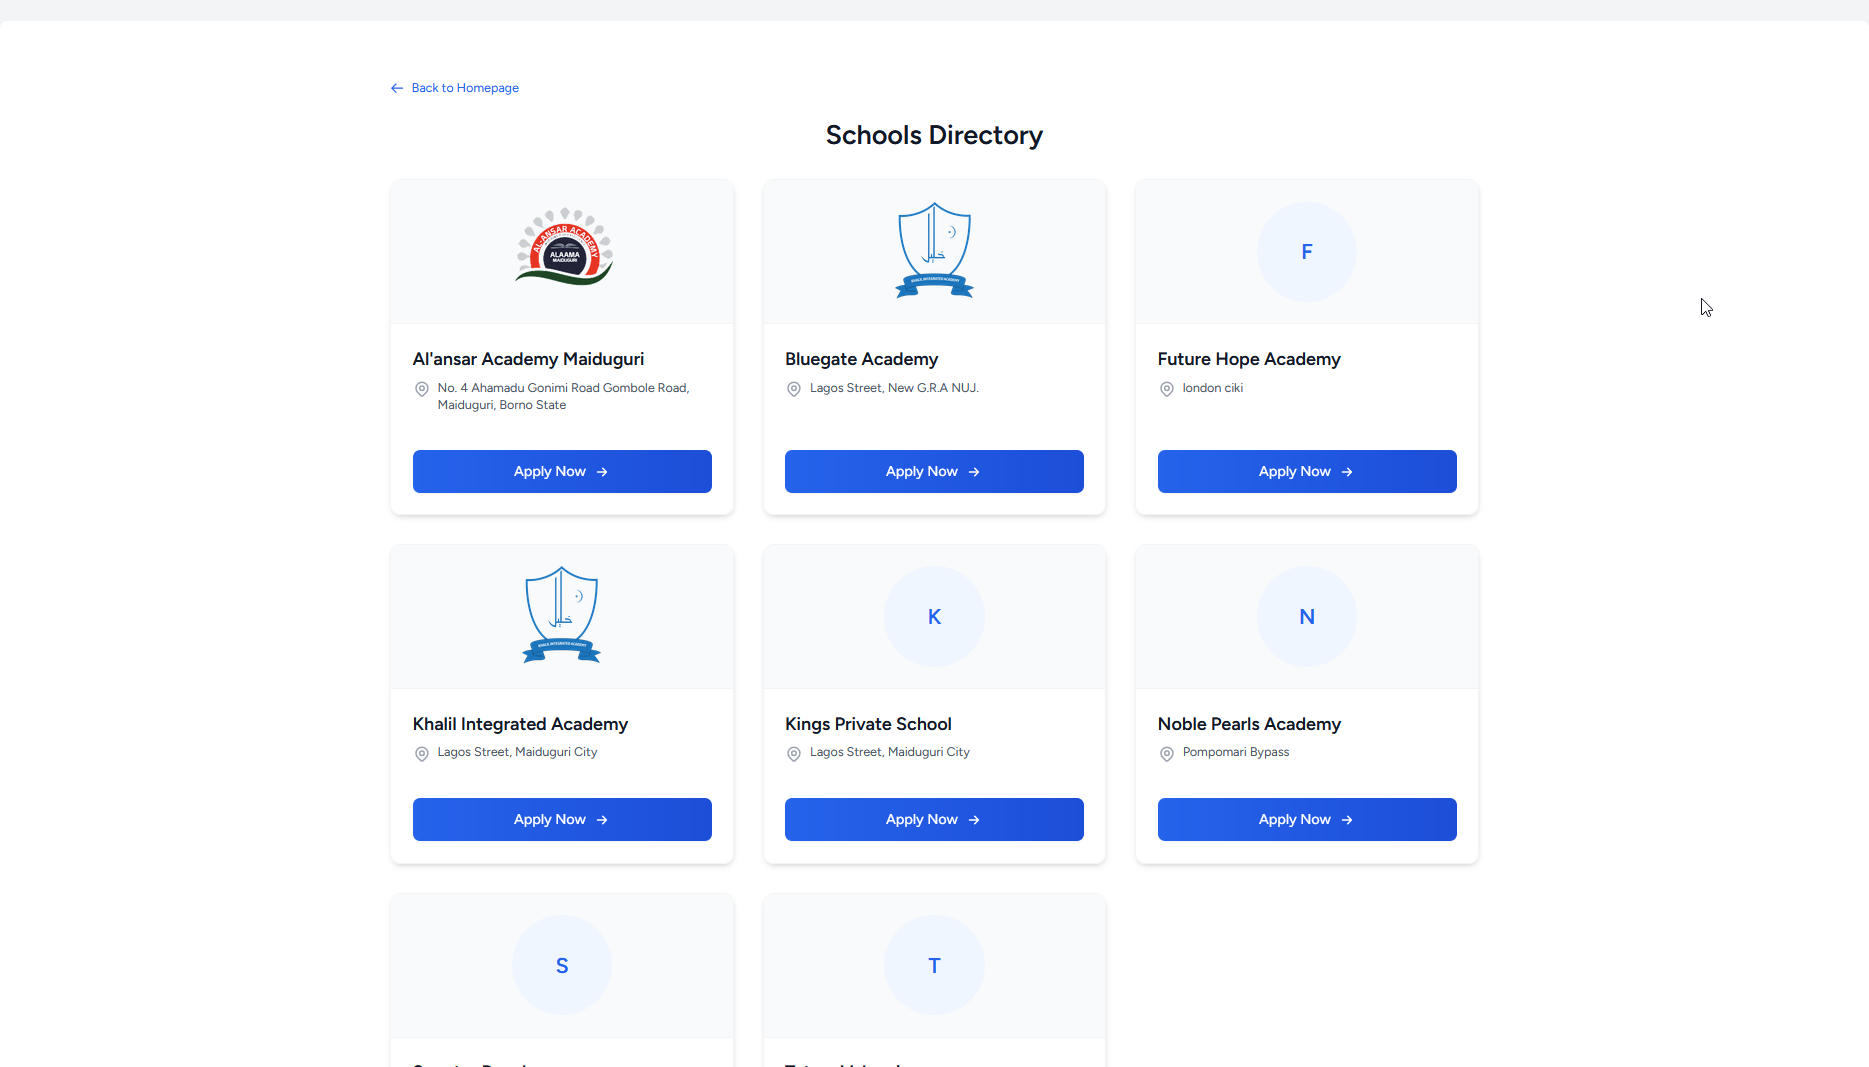
Applicants can find and apply to schools via the public directory.
- Filling the Form (Multi-Step Wizard): Once accessed, applicants complete the form step-by-step:
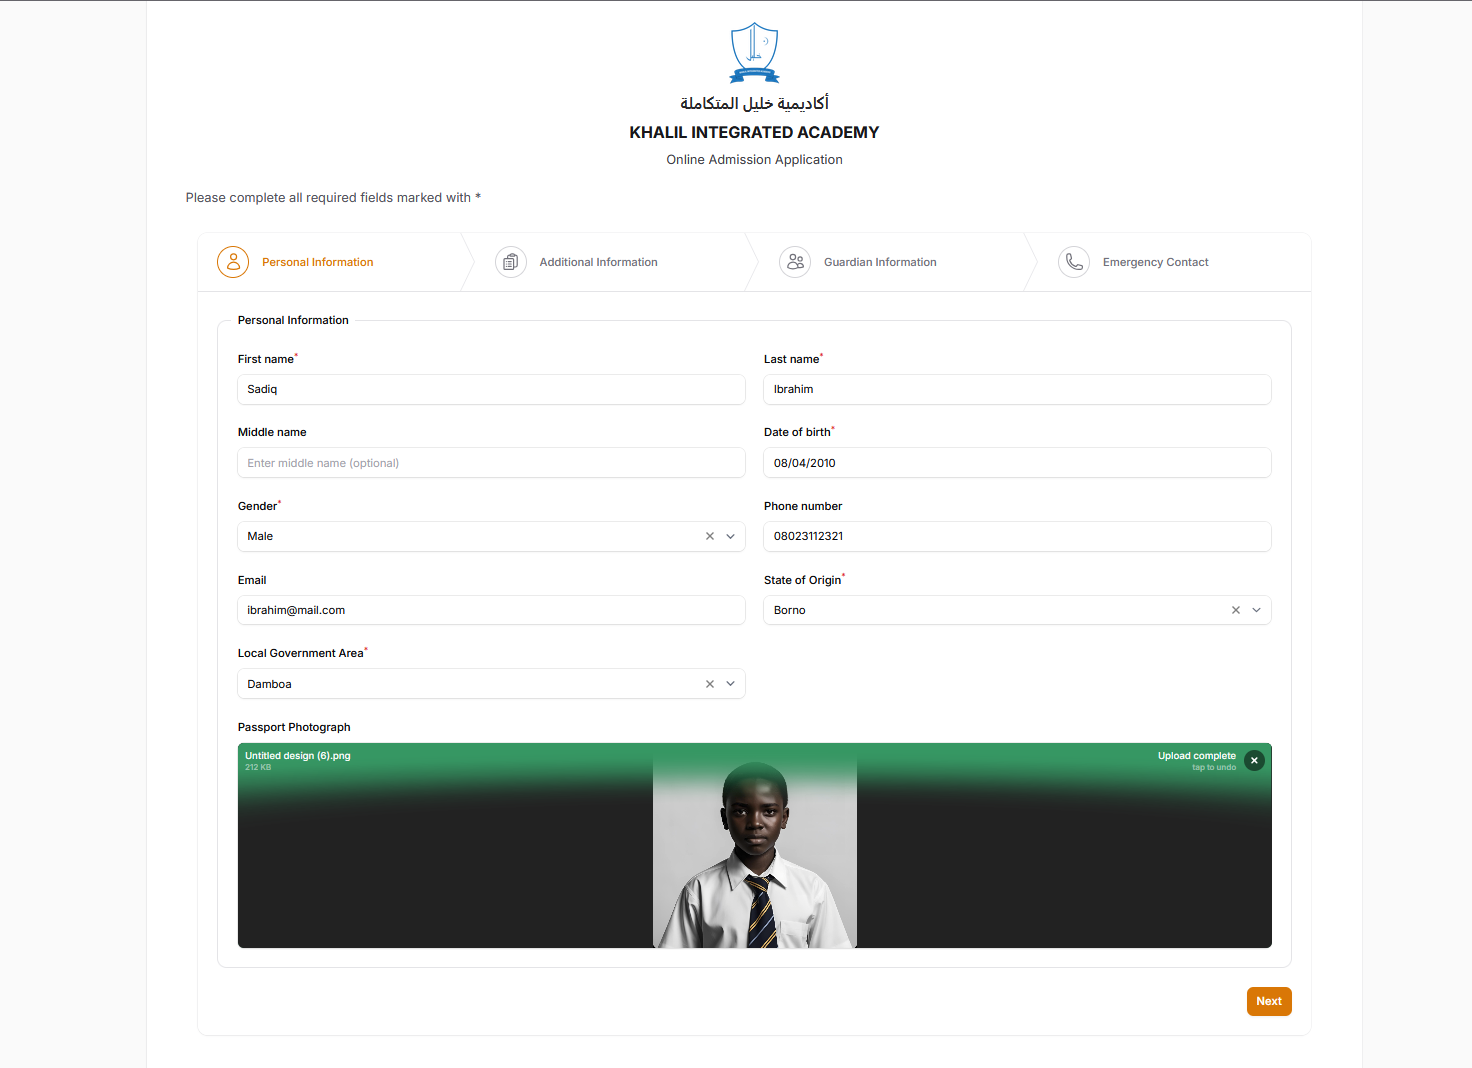
Step 2a: Personal Information: Applicants enter their First Name*, Last Name*, Middle Name, Date of Birth*, Gender*, Phone Number, Email, State of Origin*, and Local Government Area*. They also upload their Passport Photograph. Click "Next".
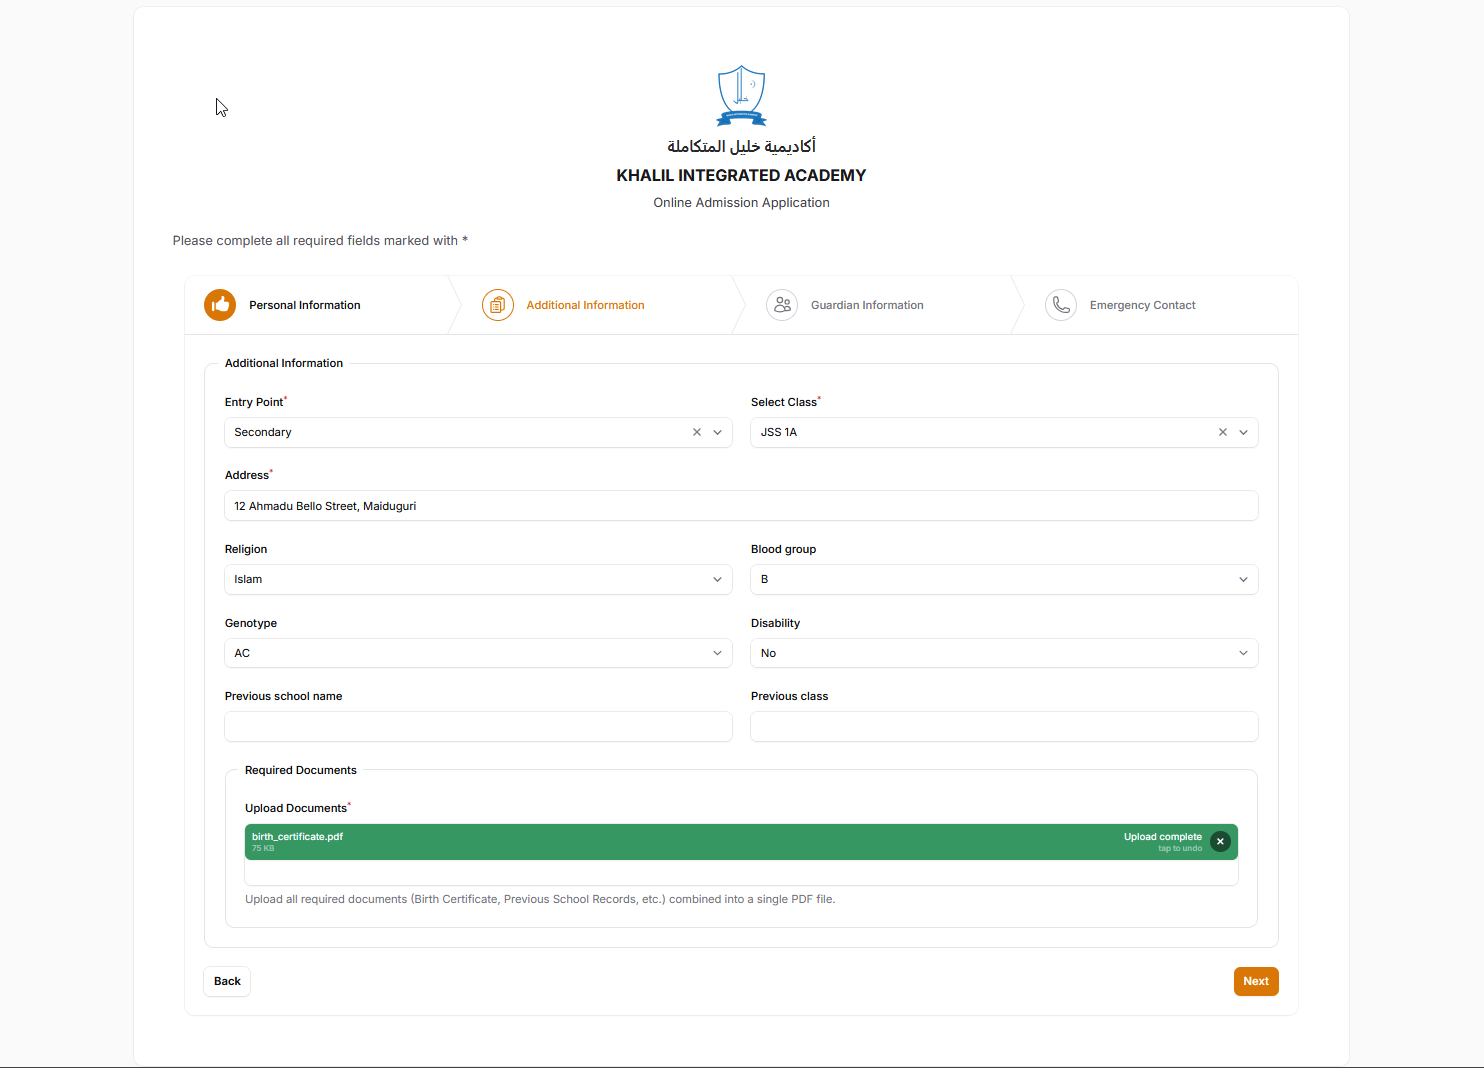
Step 2b: Additional Information: Applicants provide their full Address*, Religion, Blood Group, Genotype, and Disability status. They select their desired Entry Point* (Nursery, Primary, Secondary - based on school settings) and the specific target Class*. Details about Previous School Name and Class are entered if applicable. Finally, they upload Required Documents (e.g., Birth Certificate, Previous Results - often requested as a single combined PDF). Click "Next".
- Step 2d: Emergency Contact: Applicants enter details for an Emergency Contact: Name*, Relationship*, Phone Number*, and Email. The "Same as Guardian" link can be used to quickly copy information from the previous step. After filling this, click "Submit Application".
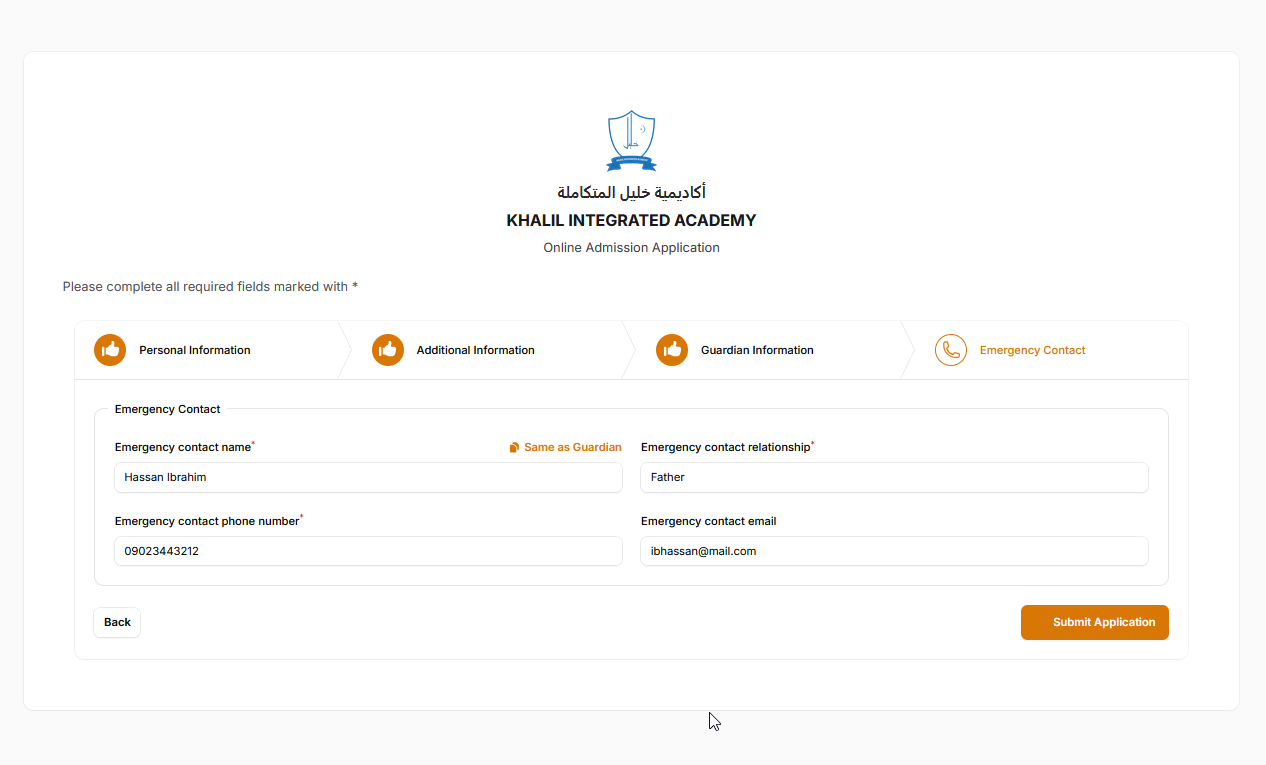
- Submission & Confirmation: After clicking "Submit Application", the applicant sees a success page confirming receipt and displaying their unique Application Reference ID.
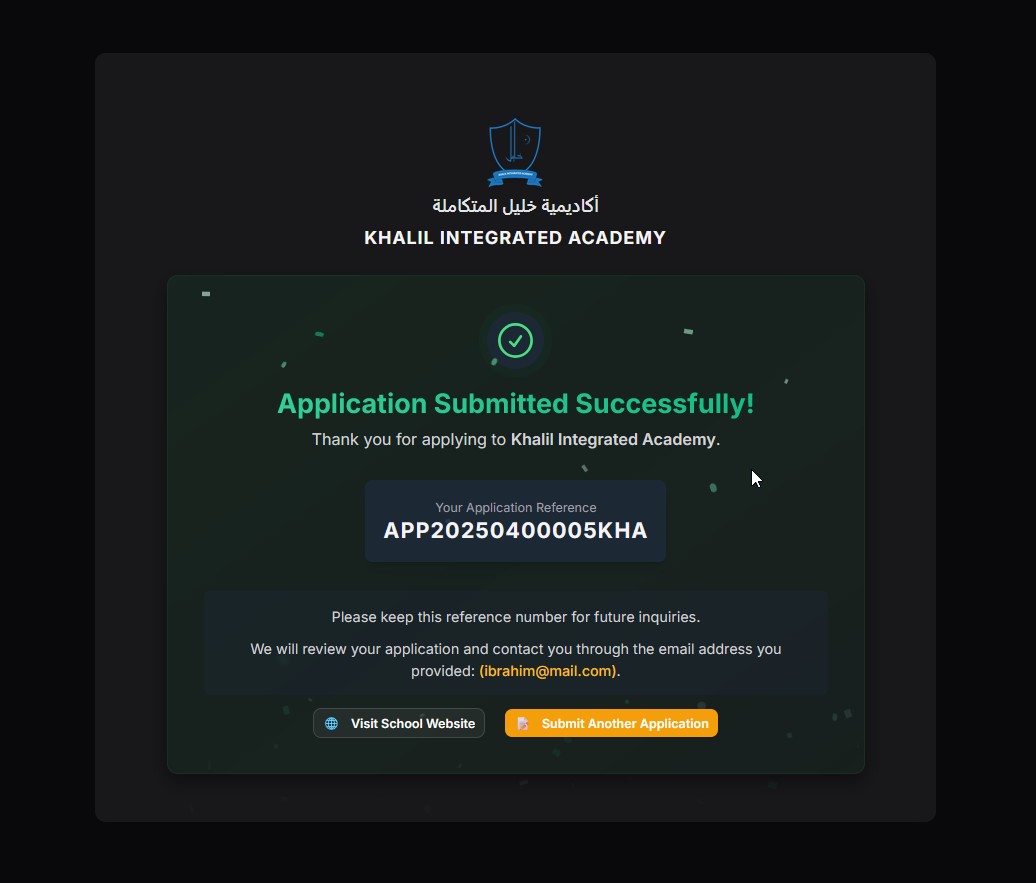
Confirmation shown to applicants after submitting the online form. - Email Notifications (Automatic):
- An email confirming submission (with the Reference ID) is sent to the applicant.
- An email notification is sent to designated school administrators alerting them to the new application in the Oraion system.
- Application Appears (Admin Side):
- Simultaneously, confirmation emails are sent to the applicant and school administrators.
- The newly submitted application immediately appears in the administrator's Admissions List within Oraion, typically with a 'Pending' status and the unique Application ID.
B. Managing Admissions (Administrator Experience)
- Accessing Admissions:
- Log in to the Oraion portal.
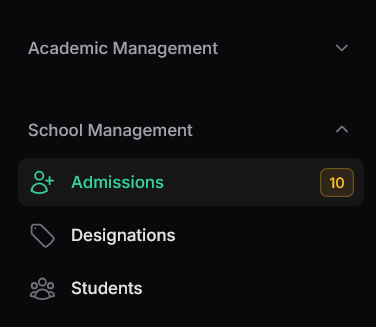
- From the sidebar, navigate to School Management > "Admissions". The badge indicates pending applications.
- (Screenshot: Show sidebar with Admissions highlighted and the badge.)
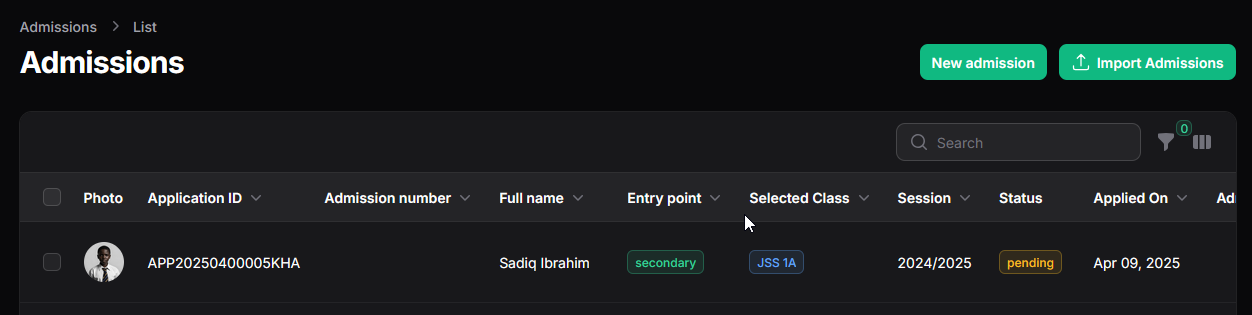
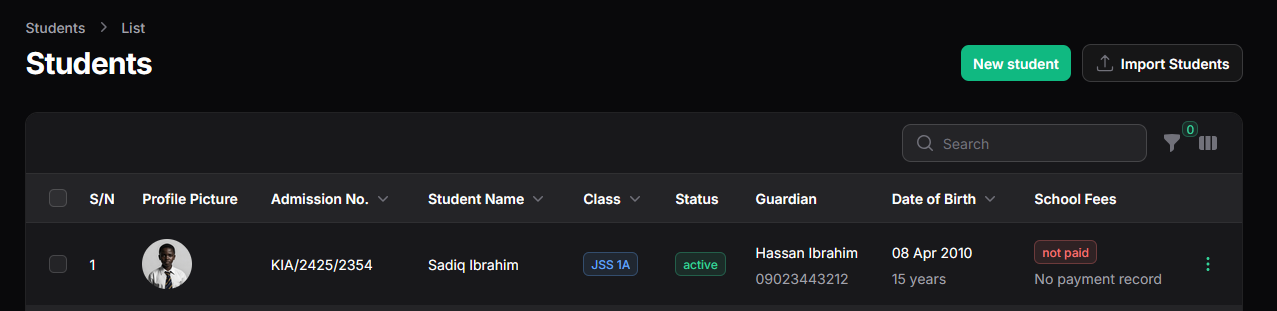
- Viewing Applications List:
- This screen lists all submitted applications.
- (Screenshot: Show the 'Admissions List' view.)
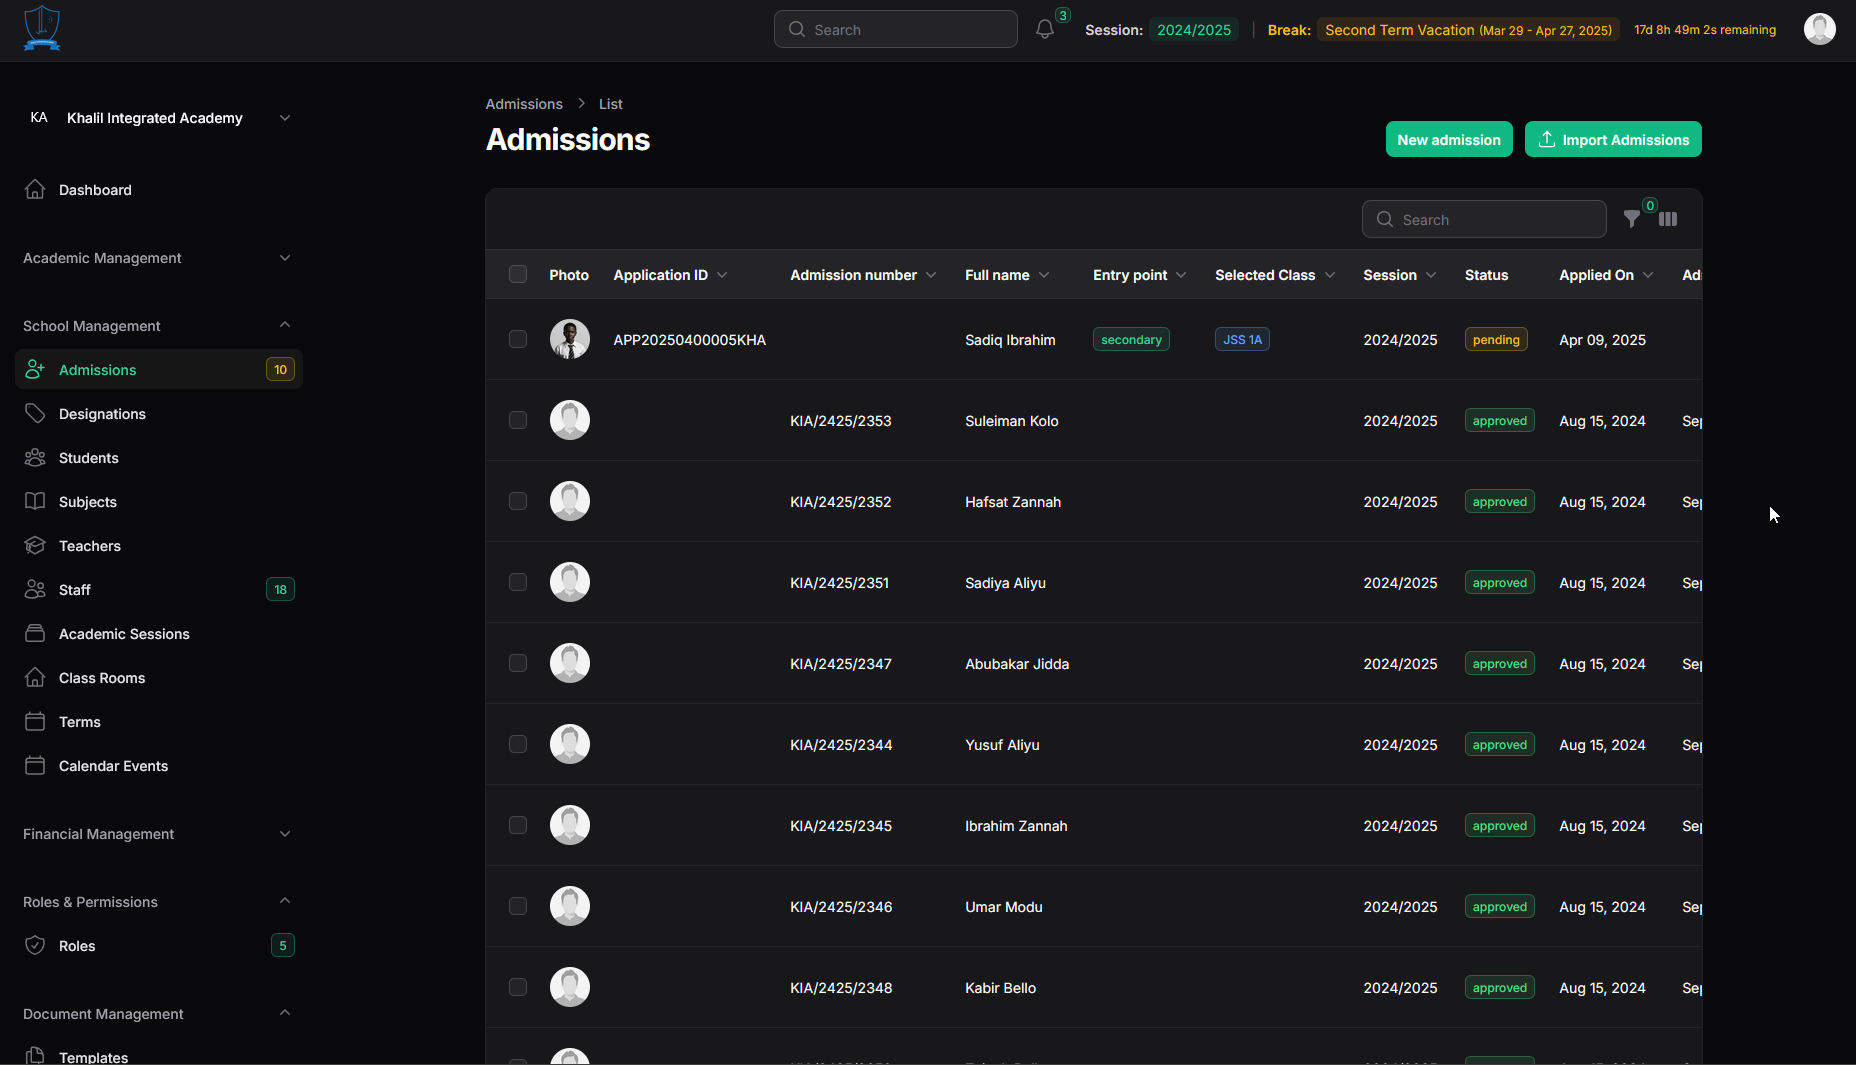
- Information Displayed: Includes columns like Photo, Application ID, Admission Number, Full Name, Entry Point, Selected Class, Session, Status, Dates, Parent/Guardian.
- Controls: Located at the top-right of the table, these tools help you manage the list:
- Search: Use the search bar to quickly find specific applications by typing keywords like applicant name, Application ID, or Admission Number.
- Filter (Funnel Icon): Click the funnel icon to open the Filters panel. This allows you to narrow down the list based on specific criteria such as Academic Session, Status (Pending, Approved, etc.), Gender, State, Entry Point, Selected Class, Age from/to, or a date range (From/Until). Select your criteria and the list will update automatically. Click Reset within the panel to clear filters.
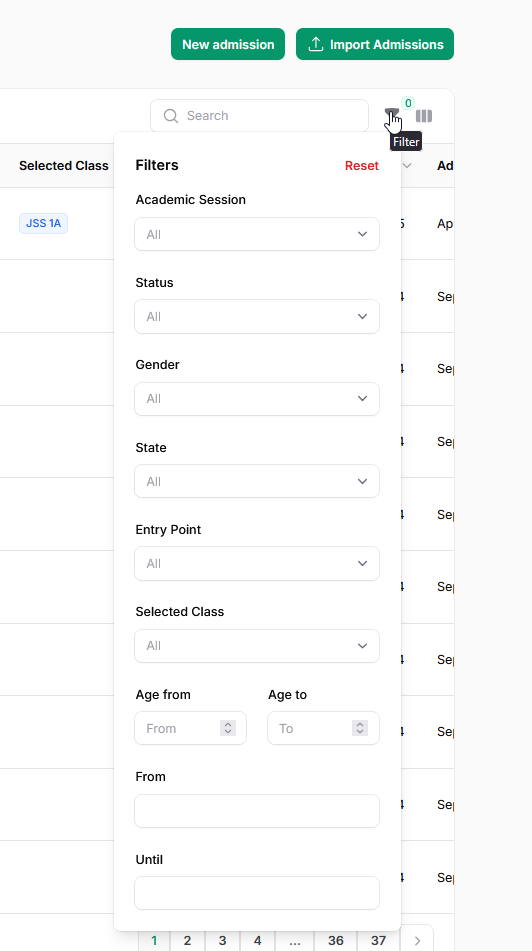
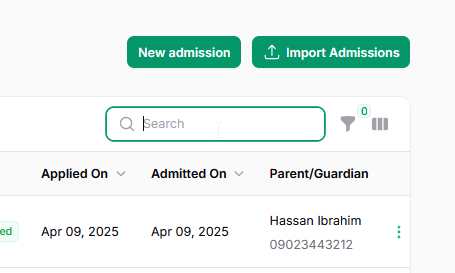
Apply filters to narrow down the list of applications based on specific criteria. - Toggle Columns (||| Icon): Click this icon to open a dropdown menu where you can check or uncheck column names (e.g., Entry point, Selected Class, Parent/Guardian) to customize which columns are visible in the table. This helps tailor the view to the information you need most.
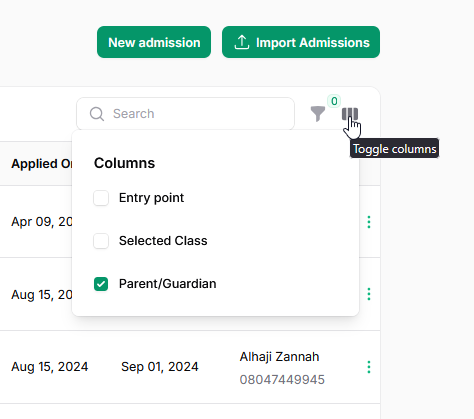
Customize the visible columns in the Admissions list table.
- Toggle Columns (||| Icon): Click this icon to open a dropdown menu where you can check or uncheck column names (e.g., Entry point, Selected Class, Parent/Guardian) to customize which columns are visible in the table. This helps tailor the view to the information you need most.
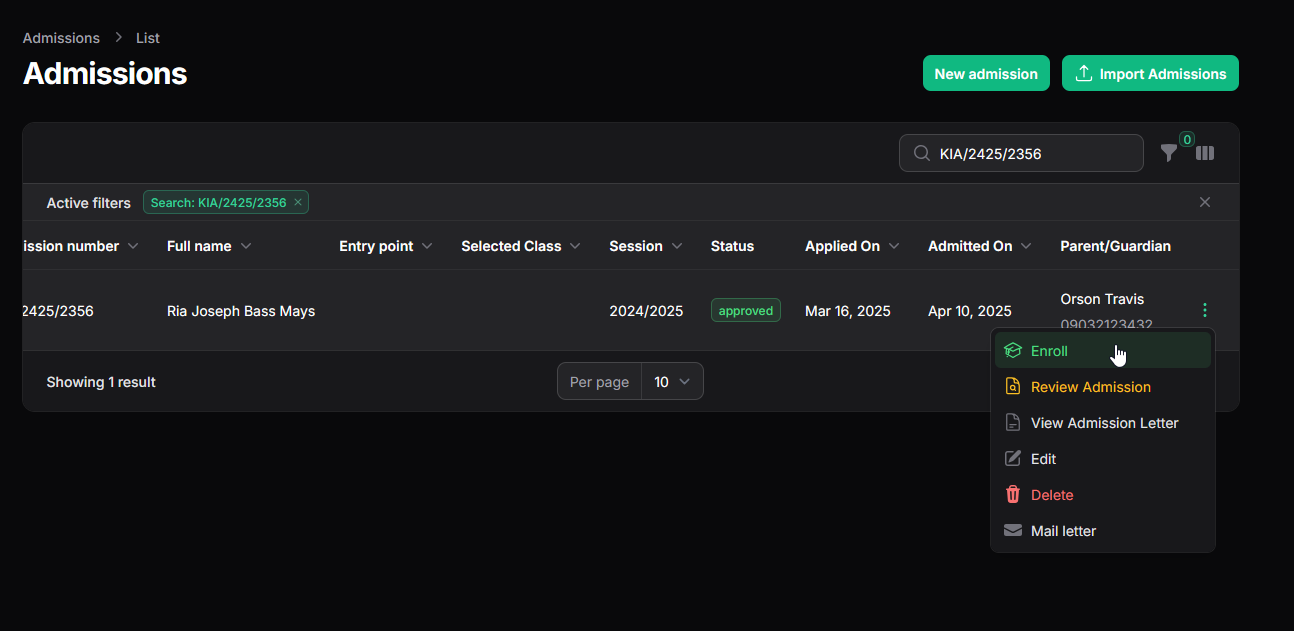
Understanding Row Actions (Three-Dot Menu)
For each application listed, clicking the three-dot icon (...) at the far right of the row opens a menu with specific actions you can take for that individual application.
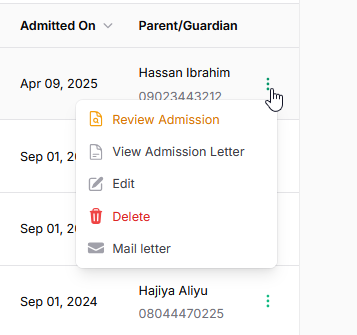
Here's what each option typically does:
- Review Admission
- Purpose: To view the complete details submitted by or entered for the applicant.
- Usage: This is the primary action used for pending applications. Clicking it opens the detailed "View Admission" page where you can thoroughly check all information (personal, contact, guardian, academic, documents) before deciding whether to Approve or Reject the application using the buttons available on that page.
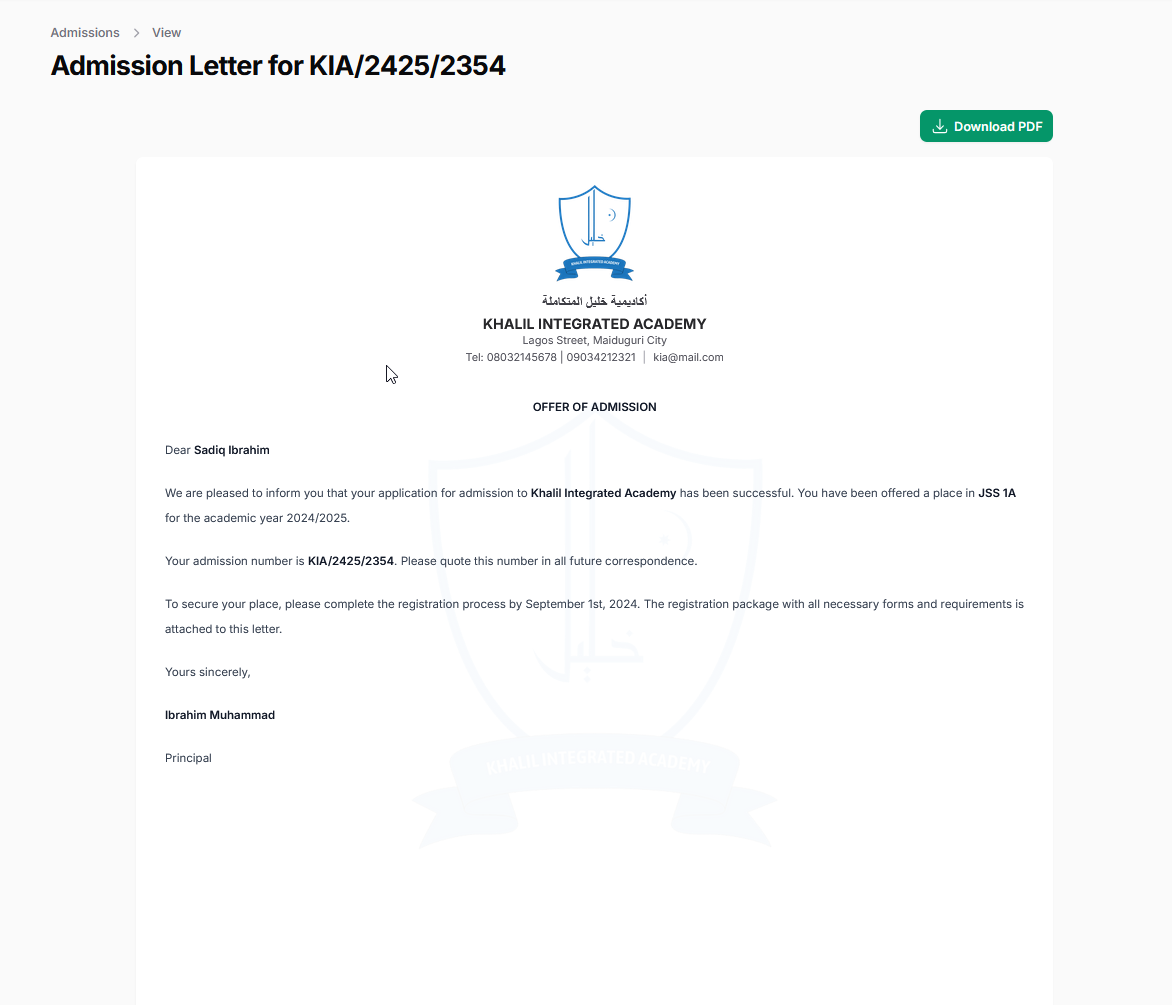
- View Admission Letter
- Purpose: To preview the official admission letter generated by the system for this applicant.
- Availability: This option becomes visible only after an application's status has been changed to "Approved" and an admission number assigned.
- Usage: Clicking this opens the letter in a new tab, allowing you to see how it looks based on the configured template. From the preview screen, you typically have an option to download the letter as a PDF document.
- Edit
- Purpose: To modify or correct the information within an existing application record.
- Usage: Use this if you spot errors or need to update details before the application has been finalized (i.e., before it's formally Approved/Enrolled or Rejected). Clicking it opens the same multi-step wizard used for creating applications, pre-filled with the current data.
- Delete
- Purpose: To permanently remove the admission application record from the system.
- Usage: Use this action with caution. It's typically intended for applications created entirely in error or obvious duplicates. If a student has already been enrolled based on this admission, deleting the admission record might orphan the student record or remove historical context. Consider carefully before deleting approved or enrolled applications.
- Mail letter
- Purpose: To send the generated Admission Letter PDF via email directly from Oraion.
- Availability: Similar to "View Admission Letter", this option is usually available only for applications with an "Approved" status.
- Usage: Clicking this opens a confirmation prompt asking if you want to send the letter to the applicant/guardian email addresses associated with the admission record. Confirming initiates the email sending process.
- Adding an Application Manually (New admission):
- If you receive an application through offline means (e.g., paper form, walk-in), you can enter it directly into Oraion. Start by clicking the "New admission" button located at the top right of the Admissions list page.
- This action will open the "Create Admission" wizard. This wizard contains the exact same 4 steps and fields as the online application form described in Section A (Applicant Experience) above (Steps 2a through 2d).
- Refer back to the descriptions and screenshots provided in Section A for detailed guidance on filling out:
- Step 1: Personal Information
- Step 2: Additional Information
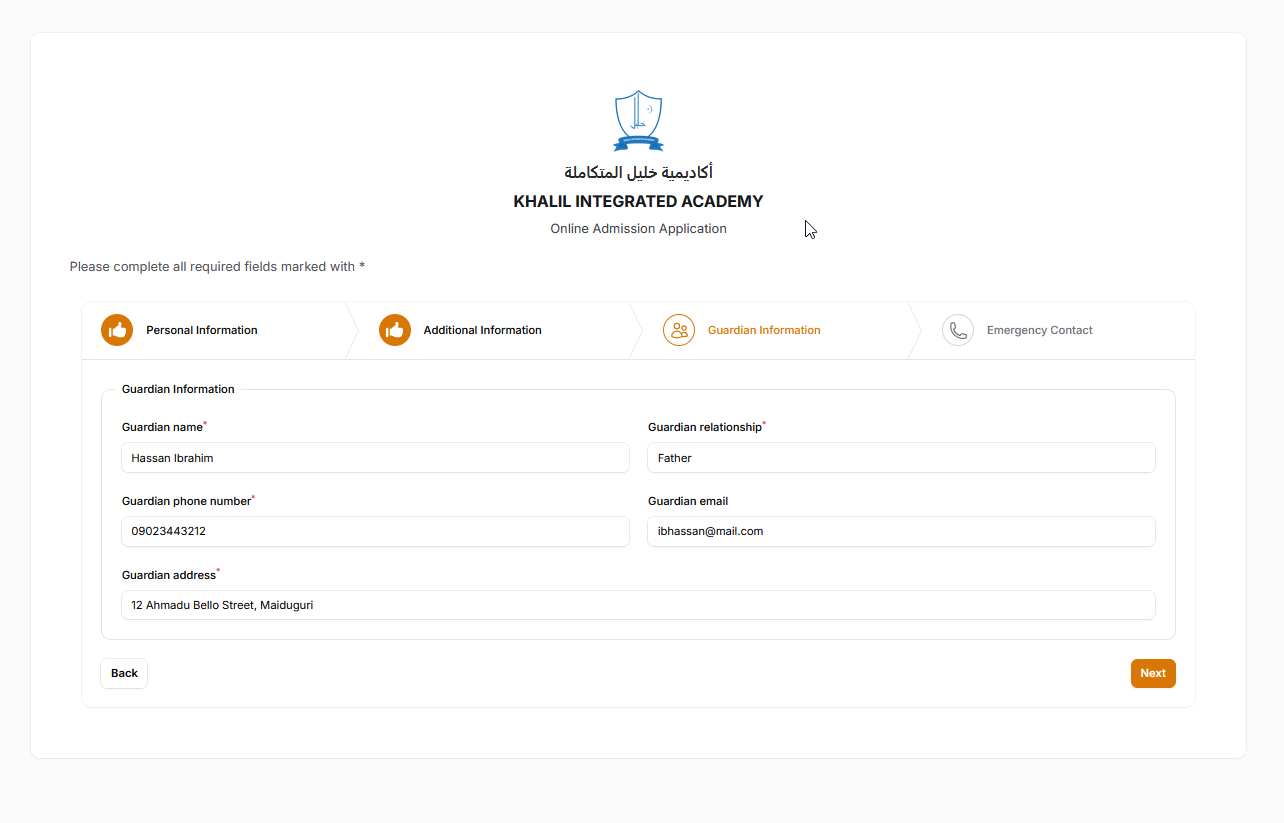
- Step 3: Parent Information/Guardian
- Step 4: Emergency Contact Information
- Key Difference for Admins: When entering manually, ensure you select the appropriate initial Status for the application in Step 2 (typically, this should be set to 'Pending' to initiate the review workflow). You also select the Application date.
- Complete all required fields across the wizard.
- Click "Submit" on the final step.
- The manually entered application will now appear in the main Admissions list alongside any online submissions, with the 'Pending' status you selected, ready for the standard review process. Automated email notifications are typically sent if applicant/guardian email addresses were provided during manual entry.
- Reviewing and Processing an Application (Review Admission):
- From the list, click the three-dot menu for a 'Pending' application and select "Review Admission".
- The "View Admission" page displays all details in collapsible sections. Review carefully. Action buttons (Approve/Reject) are at the top right.
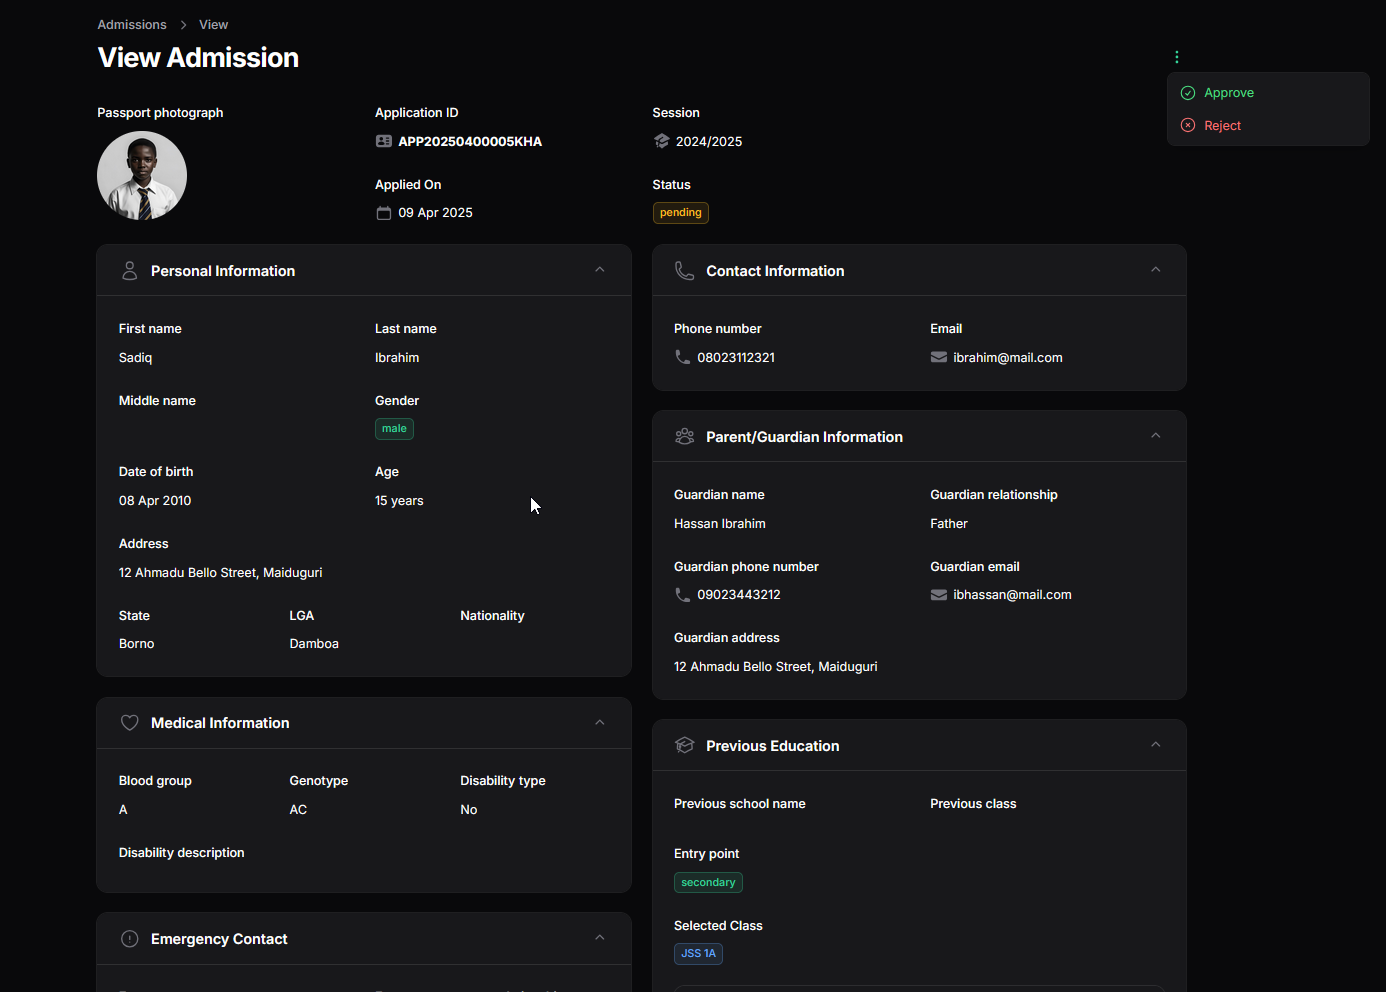
- Approving an Application:
- Once you have reviewed the details and decided to accept the applicant, click the "Approve" button (usually located at the top right of the "View Admission" page).
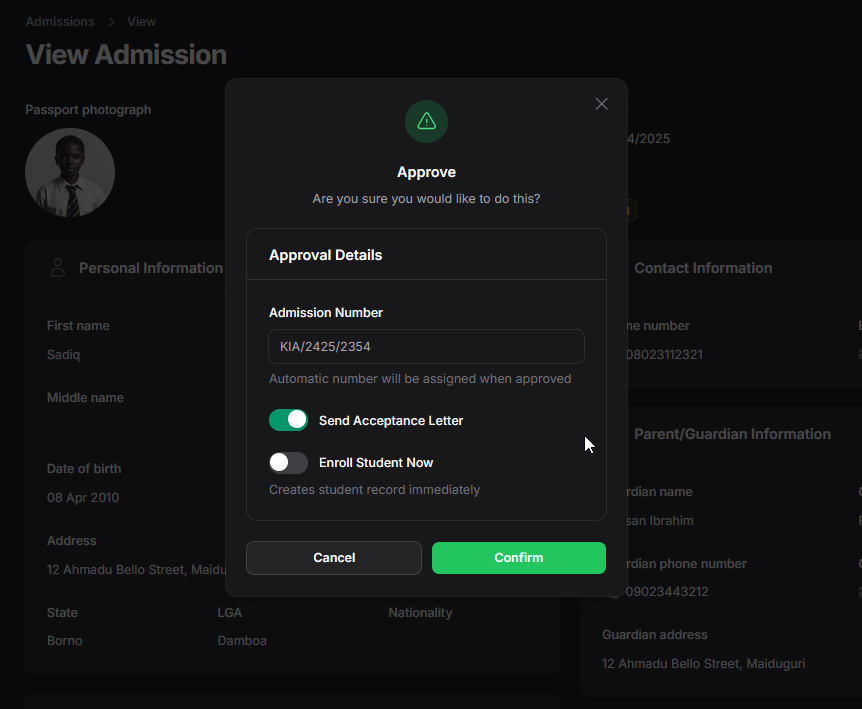
- This opens the "Approve" confirmation modal.(Placeholder - Screenshot showing the Approve modal in its initial state with 'Enroll Student Now' toggled OFF.)
- Modal Components:
- Confirmation: Asks "Are you sure you would like to do this?"
- Admission Number: Displays the Admission Number to be assigned. This is typically auto-generated based on your settings (as indicated by the helper text "Automatic number will be assigned when approved"), but may be editable if manual numbering is enabled in settings. Verify its correctness.
- Send Acceptance Letter: (Toggle, ON by default) Leave this ON to automatically email the official Admission Letter PDF to the applicant/guardian upon confirmation. Toggle OFF if you prefer to send it manually later (using the 'Mail letter' action).
- Enroll Student Now: (Toggle, OFF by default) This controls immediate student record creation.
- When OFF (Default): As shown in the screenshot above, clicking "Confirm" will only approve the admission and assign the number. The student record needs to be created separately later using an "Enroll" action.
- When ON: This enables immediate enrollment. Toggling it ON reveals the "Assign Class" dropdown.
- Confirmation Action:
- After setting the toggles and selecting a class (if enrolling now), review all details in the modal.
- Click the green "Confirm" button.
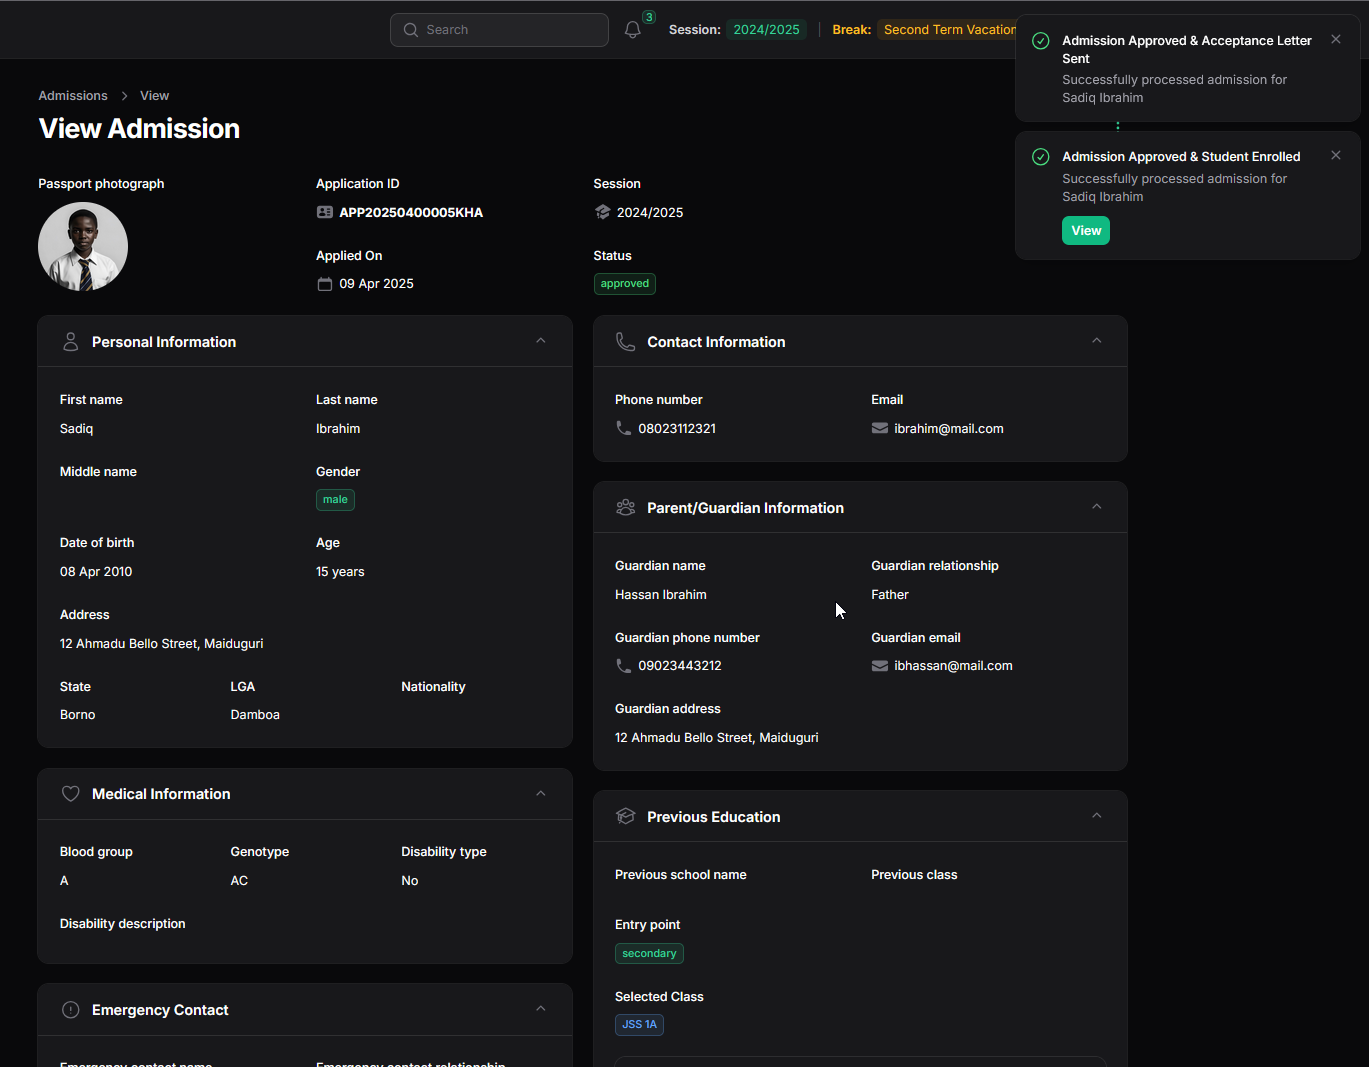
- Outcome:
- The system updates the application status to "Approved".
- The Admission Number is finalized and saved.
- If "Send Acceptance Letter" was ON, the email process is initiated.
- If "Enroll Student Now" was ON, the Student record is created immediately, and the student is placed in the selected class.
- Success notifications appear confirming the actions taken.
- Rejecting an Application:
- Click "Reject". Enter a reason if prompted and confirm.
- Post-Approval Actions:
- Enroll Later: For 'Approved' applications not yet enrolled, use an "Enroll" action to create the Student record.
- Admission Letter:
- View Admission Letter (action): Opens a preview. Download the PDF from the preview page if needed.
Key Points:
- Manage all applications centrally from the Admissions list.
- The sidebar badge indicates pending applications.
- Approval assigns the Admission Number.
- Enrollment creates the active Student record.
- Online application availability depends on your plan. Related settings are managed elsewhere.
This module ensures a smooth onboarding process for new students.
On this page
On this page
Related Articles
Student Management
Managing Student Records (Profiles)Content:This guide explains how to access, view, update, and manage the records of students who are officially enro...
Classes Management
Managing Classes & Sections (Classrooms)Classrooms in Oraion represent the specific academic groups or sections where students are placed (e.g., "...
Subjects Management
Managing SubjectsSubjects represent the core academic disciplines taught at your school (e.g., Mathematics, English Language, Physics, Al Quran). Defi...